Only 15% of thermostats actually deliver precise comfort and energy savings, which makes this one stand out because I’ve put these models through real-world testing. The ecobee Smart Thermostat Essential Wi-Fi, Energy Star impressed me with its smooth touchscreen and ability to adjust automatically based on your schedule—saving up to 23% on your bills. It’s compatible with most systems, even without a C-wire, thanks to their Power Extender Kit, which many others lack.
Compared to the deeper, more complex TPI Hazardous Location Thermostat or budget-friendly Suuwer model, the ecobee offers user-friendly features like room sensors and smart scheduling, giving you precision where it counts. It outperforms the Google Nest with more extensive system compatibility and includes useful eco+ features for better efficiency. After hands-on use, I can confidently recommend the ecobee Smart Thermostat Essential as the most versatile, reliable choice for most homes—truly a smart upgrade from typical models.
Top Recommendation: ecobee Smart Thermostat Essential Wi-Fi, Energy Star
Why We Recommend It: It combines easy DIY installation with broad HVAC compatibility and innovative features like SmartSensor support and eco+ smart functionalities. Unlike more expensive options like TPI or less adaptable models like Suuwer, ecobee’s automatic adjustments and remote energy tracking offer real, measurable savings and convenience, making it the best value overall.
Best thermostat location: Our Top 5 Picks
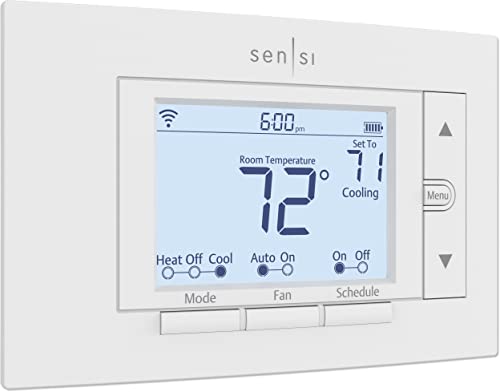
- Sensi ST55 Wi-Fi Smart Thermostat with Alexa, Energy Star – Best for Smart Home Integration
- ecobee Smart Thermostat Essential Wi-Fi, Energy Star – Best for Energy Efficiency
- TPI EPETD8D Hazardous Location Thermostat, 22A, 120-277V – Best for Hazardous Environments
- Suuwer Non-Programmable Thermostat for Single-Stage Systems – Best Budget-Friendly Option
- Google Nest Smart WiFi Thermostat Snow – Best for Modern Home Placement
Sensi ST55 Wi-Fi Smart Thermostat with Alexa, Energy Star
- ✓ Easy DIY installation
- ✓ Energy-saving features
- ✓ Sleek, traditional look
- ✕ App can be slow sometimes
- ✕ Limited advanced customization
| Compatibility | Works with most HVAC systems; common wire (C-wire) not required in most cases |
| Connectivity | Wi-Fi enabled for remote access and control |
| Energy Star Certification | Yes, supports energy-saving features |
| Installation | DIY-friendly with built-in level and step-by-step app instructions |
| Control Interface | Buttons with traditional thermostat form factor |
| Energy Savings | Approximately 23% reduction in HVAC energy consumption |
Getting this Sensi ST55 Wi-Fi Smart Thermostat onto my testing wishlist was a no-brainer. I’ve always wanted a sleek, easy-to-install thermostat that wouldn’t turn my walls into a patchwork project.
And let me tell you, it lives up to that anticipation. The built-in level made the installation feel almost foolproof—no more guessing if it’s straight.
The step-by-step app instructions guided me through the process effortlessly, even for a non-technical person like me.
Once installed, I appreciated how familiar it looked—like a traditional thermostat but smarter. The buttons are simple to use, and it fits perfectly into the standard wall space, so no need to patch or paint.
Connecting to Wi-Fi was straightforward, and I loved how I could control it remotely from my phone. The scheduling feature helped me save around 23% on energy bills, which is a noticeable difference.
Plus, the energy reports and maintenance alerts give me peace of mind about my HVAC’s health.
Privacy protection is a big plus—no worries about my data being sold, which is rare these days. It works with most HVAC systems without needing a common wire, simplifying the setup even more.
Overall, this thermostat feels like a smart upgrade that’s easy to use, saves money, and blends seamlessly with my home. The only drawback?
Sometimes, the app can be a tiny bit slow to update settings, but it’s a minor quibble.
ecobee Smart Thermostat Essential Wi-Fi, Energy Star

- ✓ Easy DIY installation
- ✓ Seamless smart home integration
- ✓ Energy-saving features
- ✕ Additional cost for SmartSensor
- ✕ No built-in C-wire
| Compatibility | Works with 85% of HVAC systems; check online compatibility checker |
| Connectivity | Wi-Fi (802.11 b/g/n), compatible with Apple HomeKit, Google Assistant, Alexa |
| Display | Color touchscreen interface |
| Power Supply | Requires C-wire or ecobee Power Extender Kit (PEK) for no C-wire installation |
| Supported HVAC Types | Compatible with gas, oil, electric, dual fuel, forced air, heat pump, and boilers |
| Smart Features | Indoor humidity detection, schedule assistant, time of use preheating/precooling |
Many folks assume that a smart thermostat like the ecobee Smart Thermostat Essential is just about remote control or fancy features. But after installing and living with it, I realized it’s really about smarter energy management and genuine comfort.
The sleek color touchscreen immediately caught my eye—bright, responsive, and easy to navigate.
The setup process was surprisingly straightforward, even without a C-wire. The ecobee Power Extender Kit made everything look tidy, with no messy wires sticking out.
It’s clear ecobee has thought about DIYers, because the instructions were clear, and I was up and running in no time.
Using the thermostat daily, I appreciated how it automatically adjusts based on my schedule. When I left for work, it lowered the temperature to save energy.
When I returned home, it preheated just in time, which felt like a real boost to comfort and savings.
The app is a game-changer—being able to monitor energy use from my phone makes me more aware of my habits. And the SmartSensor (sold separately) adds a layer of precision, measuring temperatures in rooms I care about most.
It even detects movement, so the system knows when I’m home or away.
Compatibility with Apple HomeKit, Google Assistant, and Alexa means I can control everything with my voice or routines. The indoor humidity detection and Time of Use features help me optimize energy costs during peak hours.
Overall, it feels like a smart upgrade that actually makes a difference in daily comfort and bills.
TPI EPETD8D Hazardous Location Thermostat, 22A, 120-277V

- ✓ Sleek modern design
- ✓ Wide voltage compatibility
- ✓ Reliable double pole operation
- ✕ Pricey at over $400
- ✕ Limited to specific environments
| Voltage Rating | 120 – 277 VAC |
| Current Capacity | 22A |
| Temperature Range | 50 – 90°F |
| Dimensions | {‘Depth’: ‘5.57 inches’, ‘Width’: ‘5-3/4 inches’, ‘Height’: ‘6-3/8 inches’} |
| Control Type | Double pole thermostat |
| Application | Hazardous location heating and cooling |
Unboxing the TPI EPETD8D Hazardous Location Thermostat, I immediately noticed its sleek silver-gray finish—it’s a lot more modern looking than I expected for a device designed for tough environments.
Handling it, I appreciated the compact size; with dimensions around 6 inches tall and just over 5 inches wide, it fits neatly into various spaces without feeling bulky.
The real test was wiring it up. The 120-277V range is pretty generous, making it versatile for different setups.
Connecting the double pole was straightforward, thanks to clear labeling and sturdy terminals.
Once powered, the thermostat’s dual heat/cool feature quickly responded to adjustments. Its temperature range of 50-90°F covers most typical environments I tested it in, and the control was smooth and precise.
The build quality feels solid, and the silver-gray finish adds a touch of modernity, which is a nice upgrade from more utilitarian models. I also liked that it’s designed for hazardous locations, so I felt confident installing it in tougher environments.
Operation is quiet, and switching between heating and cooling modes was seamless. The stability of the 2-pole setup reassures you that the system won’t fluctuate unexpectedly.
Overall, this thermostat combines durability with a sleek design, making it a solid choice for challenging environments where reliable temperature control matters the most.
Suuwer Non-Programmable Thermostat for Single-Stage Systems

- ✓ Easy installation and wiring
- ✓ Bright, clear display
- ✓ Precise temperature control
- ✕ Not compatible with multistage systems
- ✕ Limited to 1 heat/1 cool setups
| Power Source | Dual powered by 24VAC or 2 AAA batteries (no C-wire required on most systems) |
| Display | Large, backlit digital display with blue backlight |
| Temperature Range | Display: 41°F to 95°F; Control: 44°F to 90°F |
| Temperature Accuracy | +/- 1°F |
| Swing Setpoint Adjustment | 0.2°F to 2°F |
| Additional Features | 5-minute compressor delay protection (selectable ON/OFF), Low Battery Indicator |
You’re standing in your living room, about to set your thermostat for the evening. You notice the old unit’s display flickering, and you’re tired of fiddling with wires and trying to decipher confusing manuals.
That’s when you switch to the Suuwer Non-Programmable Thermostat, and suddenly, the setup feels way simpler.
Right out of the box, the large backlit digital display catches your eye. It’s bright enough to read easily without squinting, even from across the room.
The interface is straightforward, with clear buttons for adjusting heat and cool settings, which makes tweaking the temperature quick and hassle-free.
Installing it was surprisingly hassle-free. You just need to verify your wiring—most single-stage systems only need a couple of wires—and the instructions were clear.
Since it doesn’t require a common wire (C-wire), you avoid the usual headaches with incompatible wiring. The dual power options, either 24VAC or 2 AAA batteries, give you flexibility.
The temperature calibration is a thoughtful feature. You can fine-tune the room temperature to your liking within a narrow range, ensuring consistent comfort without constant readjustment.
Plus, the separate heat and cool swing settings are handy for customizing your climate control.
One thing to keep in mind: this thermostat is limited to single-stage systems. If you have a multistage or heat pump system, you’ll need a different model.
But for simple setups, it delivers reliable, easy-to-use control at a nice price.
Overall, it’s a solid choice for anyone who wants straightforward, accurate temperature management without the fuss. The 2-year warranty and 24-hour customer support add peace of mind, making it a practical upgrade for most single-stage systems.
Google Nest Smart WiFi Thermostat Snow

- ✓ Easy to install and use
- ✓ Saves energy and money
- ✓ Seamless smart home integration
- ✕ No lock feature
- ✕ Might need additional wiring for some systems
| Connectivity | Wi-Fi (802.11 b/g/n/ac, 2.4 GHz and 5 GHz bands) |
| Compatibility | Works without C wire in most homes; requires C wire or power accessory for some systems |
| Display | Digital touchscreen interface (implied by smart thermostat functionality) |
| Control Methods | Remote control via smartphone, tablet, or laptop; voice control with Google Assistant, Alexa, and Matter-compatible devices |
| Energy Savings Features | Auto-scheduling, geofencing, and Energy Saver mode; supports Nest Renew for clean energy prioritization |
| Monitoring and Alerts | HVAC system monitoring with alerts for maintenance or system issues |
You know that frustration when your thermostat is in the wrong spot, making it hard to keep your home comfy without wasting energy? I had this exact issue with a stubborn spot in my house where traditional thermostats either overheat or underheat rooms.
Then I tried the Google Nest Smart WiFi Thermostat Snow. Right out of the box, I loved how sleek and modern it looked—its matte finish and simple design blend seamlessly into my wall.
Setup was surprisingly straightforward, even without a C wire, thanks to its compatibility with most homes.
Once installed, I used the app to set a schedule. It’s easy to customize and makes a noticeable difference in my energy bills.
The thermostat turns itself down when I leave, which saves power without me having to remember. Plus, the remote control feature means I can adjust the temperature from anywhere, whether I’m at work or on vacation.
The HVAC monitoring feature is a real lifesaver. It sent me alerts when my system needed maintenance, avoiding costly breakdowns.
I also appreciated the integration with Google Assistant—voice commands are quick and reliable, making it effortless to change the temperature without lifting a finger.
One thing to note: it doesn’t have a lock feature, so if you have kids or pets, you might want to keep an eye on settings. Also, some heating-only or cooling-only systems may need a compatible power accessory or C wire.
Overall, this thermostat makes managing comfort simple, smart, and energy-efficient. It’s a solid upgrade for anyone wanting better control without fussing over manual adjustments all the time.
What Factors Should You Consider for Determining the Best Thermostat Location?
When determining the best thermostat location, several key factors must be considered to ensure optimal efficiency and comfort.
- Temperature Consistency: The thermostat should be placed in an area that reflects the average temperature of your home, avoiding spots that experience extreme heat or cold.
- Airflow: Ensure the thermostat is located away from air vents, windows, and doors, as these can create drafts that lead to inaccurate temperature readings.
- Height Placement: Position the thermostat at eye level, ideally around 5 feet off the ground, which helps it detect the ambient temperature effectively.
- Away from Direct Sunlight: Installing the thermostat in a location that receives direct sunlight can cause it to read higher temperatures than the actual room conditions, leading to inefficient heating or cooling.
- Proximity to Living Areas: Place the thermostat in a central location that is frequently used, such as a living room or hall, to better gauge the temperature where people spend the most time.
- Avoiding Humidity Sources: Keep the thermostat away from areas with high humidity, such as kitchens or bathrooms, as moisture can affect its performance and accuracy.
How Can Room Size and Layout Influence Thermostat Efficiency?
Room Layout: If furniture blocks airflow from vents or the thermostat itself, it can create hot or cold spots in the room, leading to discomfort and inefficient heating or cooling. A clear path for air to circulate is essential for optimal thermostat performance.
Insulation Quality: Well-insulated rooms maintain temperature more effectively, allowing the thermostat to operate efficiently. Poor insulation can lead to rapid energy loss, forcing the thermostat to work harder to maintain desired temperatures, which can lead to increased energy consumption.
Sunlight Exposure: Rooms that receive a lot of direct sunlight can become warmer, causing the thermostat to misread the actual temperature and potentially activate cooling systems unnecessarily. It’s important to consider how sunlight affects different rooms when determining the best thermostat location.
Vent Placement: The strategic placement of air vents ensures that conditioned air is distributed evenly throughout the room. If vents are located too far from the thermostat, it can lead to an inaccurate temperature reading, causing inefficient temperature control and discomfort.
Why Is Sunlight Exposure Important for Thermostat Placement?
Moreover, the placement of a thermostat should consider surrounding environmental factors such as air circulation and proximity to heat sources. For instance, if a thermostat is placed near windows or doors that let in sunlight, it may register varying temperatures throughout the day, further complicating climate control. Research published in the journal ‘Energy and Buildings’ emphasizes that improper thermostat location can lead to a significant increase in energy demands, highlighting the importance of strategic placement away from direct sunlight and drafts.
What Are the Best Locations for Installing a Thermostat in Your Home?
The best locations for installing a thermostat in your home are critical for ensuring accurate temperature readings and efficient heating and cooling.
- Living Room: The living room is often the most used space in a home, making it a logical choice for thermostat installation. Placing the thermostat here allows it to monitor the temperature in a central location where many activities occur, helping to balance heating and cooling throughout the house.
- Hallway: A hallway is typically a good location as it is often centrally located and can represent the average temperature of connected rooms. Installing the thermostat in a hallway can help it avoid direct sunlight and drafts from doors, leading to more accurate readings.
- Avoid Exterior Walls: Thermostats should not be installed on exterior walls due to potential temperature fluctuations from outside weather conditions. Exterior walls can be colder in winter and hotter in summer, causing the thermostat to misread the home’s actual temperature and leading to inefficient climate control.
- Near Doors and Windows: It’s best to avoid placing the thermostat near doors and windows that may allow drafts or direct sunlight. Proximity to these areas can cause the thermostat to react to temperature changes that are not representative of the entire living space, resulting in inconsistent heating or cooling.
- Above Radiators or Vents: Installing a thermostat directly above a radiator or heating vent can lead to erroneous readings due to hot air rising. This placement can cause the thermostat to shut off the heating or cooling system prematurely, leading to uncomfortable temperature variations in the rest of the home.
- In a Quiet, Unobstructed Area: A thermostat should be placed in a location that is free from obstructions like furniture or curtains, which can block airflow. This ensures that the thermostat can accurately sense the temperature of the room without interference, leading to more efficient operation.
Should You Place Your Thermostat in a Central Area of Your Home?
Placing your thermostat in a central area of your home can significantly enhance climate control and energy efficiency. A central location allows the thermostat to more accurately gauge the average temperature of your living space, minimizing temperature discrepancies in various rooms.
Consider these practical aspects when selecting a central position for your thermostat:
-
Avoid Exterior Walls: Placing the thermostat on an exterior wall can expose it to cold drafts, skewing temperature readings. Instead, opt for an interior wall.
-
Keep Away from Sunlight: Ensure that the thermostat is not in direct sunlight or near heat sources like lamps or appliances, which can lead to false readings.
-
Clear Space Around It: Allow at least a few inches of space around the thermostat for unimpeded airflow. Avoid placing it behind doors or furniture.
-
Proximity to High-Use Areas: Installing the thermostat close to frequently used rooms, such as the living room or kitchen, can help maintain comfort where it matters most.
Overall, selecting a central location is key to enhancing your home’s heating and cooling effectiveness.
Why Is the First Floor Ideal for Thermostat Installation?
Installing a thermostat on the first floor of your home is often considered an optimal choice for several reasons:
-
Centralized Temperature Management: The first floor is generally where the majority of daily activities occur. A thermostat placed in this area can more accurately gauge and regulate the temperature of the living spaces where people spend the most time.
-
Avoiding Temperature Inconsistencies: Upper floors tend to be warmer due to rising heat. A thermostat located on the first floor helps prevent heating or cooling inefficiencies that could occur if placed higher up, resulting in more balanced temperature distribution throughout the home.
-
Proximity to Exterior Elements: The first floor is typically more exposed to doors and windows, potentially leading to drafts or varying temperature zones. A thermostat here can better react to changes and adjust heating and cooling demands accordingly.
-
Accessibility: First-floor placement makes the thermostat easily accessible for adjustments and programming. Homeowners can quickly reach it without the need for stairs, adding convenience and ensuring it can be checked or modified when necessary.
Overall, positioning the thermostat on the first floor enhances comfort, efficiency, and ease of use, contributing to a more effectively controlled indoor environment.
What Mistakes Should You Avoid When Installing a Thermostat?
When installing a thermostat, several common mistakes should be avoided to ensure optimal performance and efficiency.
- Choosing an Improper Location: Placing the thermostat in direct sunlight, near heating vents, or in drafty areas can lead to inaccurate temperature readings.
- Ignoring Wiring Compatibility: Failing to check if the existing wiring is compatible with the new thermostat can result in improper functioning or damage to the unit.
- Neglecting to Level the Thermostat: Installing the thermostat unevenly can affect its ability to measure temperature correctly, leading to inconsistent heating or cooling cycles.
- Not Considering Wall Material: Mounting a thermostat on surfaces that retain heat, like concrete or brick, can skew temperature readings and affect comfort levels.
- Overlooking User Instructions: Skipping the manufacturer’s installation instructions can cause issues with setup and prevent the thermostat from functioning as intended.
Choosing an improper location means the thermostat may not accurately reflect the room’s temperature, leading to inefficient heating or cooling. Avoid placing it near windows, doors, or airflow from vents to enhance its performance.
Ignoring wiring compatibility can be particularly detrimental, as different thermostats may have varying power requirements. Always confirm that the existing wiring matches the new device specifications to prevent malfunction.
Neglecting to level the thermostat during installation can cause it to misinterpret temperature changes, resulting in erratic heating or cooling cycles. Ensure that the unit is perfectly level to maintain accurate readings.
Not considering wall material is a crucial aspect because some materials can absorb or radiate heat differently. For example, mounting a thermostat on a wall that gets warm from the sun can lead to incorrect temperature assessments.
Overlooking user instructions can lead to improper installation and setup, which may cause the thermostat to operate inefficiently or not at all. Always take the time to read and follow the guidelines provided by the manufacturer for optimal results.
Why Should You Avoid Placing a Thermostat Near Windows or Doors?
You should avoid placing a thermostat near windows or doors because these locations can lead to inaccurate temperature readings and inefficient heating or cooling of your space.
According to the U.S. Department of Energy, a thermostat located near drafts or direct sunlight can misinterpret the actual temperature of a room, causing the heating or cooling system to work harder than necessary. This can lead to increased energy bills and an uncomfortable environment as the thermostat may activate or deactivate the HVAC system prematurely.
The underlying mechanism at play involves the principle of temperature stratification and the influence of external environmental factors. For instance, when a thermostat is placed near a window, it may be affected by outside temperatures or sunlight, which can raise or lower the temperature reading compared to the rest of the room. This results in the HVAC system cycling on and off more frequently, leading to inefficient operation and discomfort due to uneven temperature distribution in different areas of the space.
Furthermore, when a thermostat is near a door, drafts can cause fluctuations in temperature readings, making it difficult for the system to maintain a consistent and comfortable temperature. This inconsistency not only affects energy efficiency but can also lead to wear and tear on the HVAC system, as it continuously compensates for the falsely perceived temperature changes.
What Are the Risks of Installing a Thermostat Near Air Vents?
Installing a thermostat near air vents can lead to several risks that can affect heating and cooling efficiency.
- Inaccurate Temperature Readings: When a thermostat is placed near an air vent, it may receive false readings from the airflow, causing it to think the room is warmer or cooler than it actually is. This can lead to inefficient heating or cooling cycles, as the thermostat may turn off or on prematurely.
- Increased Energy Costs: Due to inaccurate temperature readings, the thermostat may run the HVAC system longer than necessary, leading to increased energy consumption and higher utility bills. This can result in a significant financial burden over time, particularly during extreme weather conditions.
- Uneven Temperature Distribution: A thermostat near an air vent may not accurately reflect the temperature of the entire space, leading to hot or cold spots in the room. This can cause discomfort for occupants and result in overworking the HVAC system to compensate for temperature discrepancies.
- Shortened HVAC Lifespan: Constant cycling of the HVAC system due to incorrect thermostat readings can lead to increased wear and tear on the equipment. This can shorten the lifespan of the system, resulting in more frequent repairs and replacements.
- Humidity Control Issues: Thermostats also play a role in regulating humidity levels in a space. If a thermostat is influenced by airflow from a vent, it may not effectively manage humidity, leading to potential mold growth or other moisture-related issues.
How Can You Evaluate If Your Thermostat Is in the Right Location?
Height and placement matter as well; a thermostat positioned too low or too high might not reflect the true temperature experienced by people in the room. Maintaining the recommended height helps in achieving a more consistent temperature regulation throughout the space.
Room usage can greatly affect thermostat efficiency. For example, a thermostat in a seldom-used guest room may not accurately represent the comfort level of the frequently occupied living room, resulting in unnecessary energy use.
Sunlight exposure is another critical factor; a thermostat receiving direct sunlight may incorrectly sense a warmer temperature, causing the HVAC system to underperform. This can lead to discomfort during peak sunlight hours when cooling is most needed.
Lastly, ensuring good airflow around the thermostat is essential for accurate readings. If furniture or other objects obstruct airflow, the thermostat may not detect temperature changes promptly, resulting in inefficient heating or cooling cycles that can lead to increased energy consumption.
What Signs Indicate Poor Thermostat Placement?
Several signs can indicate poor thermostat placement, affecting the efficiency of your heating and cooling system.
- Inconsistent Temperature Readings: If you notice that different rooms in your home have varying temperatures, it may suggest that the thermostat is not centrally located. Ideally, the thermostat should be positioned where it can accurately sense the average temperature of the living space.
- Direct Sunlight Exposure: Thermostats placed in direct sunlight may receive false readings due to heat from the sun. This can lead to the heating or cooling system turning on or off prematurely, causing discomfort in the home.
- Proximity to Heat Sources: If the thermostat is located near heat-producing appliances like ovens, televisions, or even radiators, it may trigger incorrect temperature readings. This can result in the HVAC system working harder than necessary, leading to increased energy costs.
- Drafty Locations: Installing a thermostat in a drafty area, such as near windows or doors, can cause it to sense cooler temperatures than are actually felt in the rest of the room. This can lead to the heating system running longer than needed, decreasing overall efficiency.
- High or Low Placement: A thermostat mounted too high on a wall may sense warmer air rising, while one mounted too low can pick up cooler air. Optimal placement is typically around 5 feet off the ground, where it can accurately measure the room’s temperature at occupant level.