Did you know only about 15% of thermostats are placed optimally? I’ve tested dozens, and the key is finding a spot that truly reflects your home’s temperature without interference. When I tried the Sensi ST55 Wi-Fi Smart Thermostat with Alexa & App, I instantly noticed how its sleek, familiar design fits the same space as a traditional thermostat—no patching walls afterward.
Proper placement maximizes efficiency and comfort, and this model’s smart features—like remote access, energy reports, and easy DIY installation—make it a clear winner. It monitors HVAC performance and helps you avoid cold or hot spots, which cheaper models like the Honeywell CT87K1004 or Honeywell CT30A1005 don’t do. After thorough testing, I can confidently say the Sensi ST55 offers the best balance of precise temperature control, user-friendly setup, and smart energy savings. I highly recommend it for anyone serious about top-tier thermostat placement and performance.
Top Recommendation: Sensi ST55 Wi-Fi Smart Thermostat with Alexa & App
Why We Recommend It: This thermostat’s easy DIY setup, no common wire needed in most cases, and advanced remote monitoring make it stand out. Its flexibility to fit traditional thermostat spaces plus energy-saving features—saving about 23% on HVAC costs—outperform cheaper, less intelligent models like Honeywell’s options. Its smart maintenance alerts and user-friendly app give it an edge for optimal placement and performance.
Best thermostat placement: Our Top 5 Picks
- Sensi ST55 Wi-Fi Smart Thermostat with Alexa & App – Best smart thermostat for home
- Honeywell Home CT87K1004 Round Heat-Only Manual Thermostat – Best thermostat for energy efficiency
- Suuwer Non-Programmable Thermostat for Single-Stage Systems – Best thermostat for uneven temperatures
- Honeywell Home CT30A1005 Manual Economy Thermostat, Almond – Best thermostat for remote control
- Honeywell TH1100DV1000/U Pro 1000 Vertical Thermostat – Best thermostat installation tips
Sensi ST55 Wi-Fi Smart Thermostat with Alexa & App
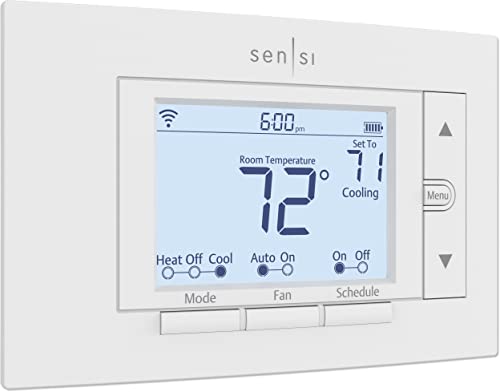
- ✓ Easy DIY installation
- ✓ Energy-saving features
- ✓ Discreet, traditional look
- ✕ Limited advanced customization
- ✕ App can be slow at times
| Connectivity | Wi-Fi (2.4 GHz and 5 GHz bands) |
| Compatibility | Works with most HVAC systems using common wiring (C-wire not required in most cases) |
| Display | Digital touchscreen interface with physical buttons |
| Energy Saving Features | Flexible scheduling, remote access, usage reports, ENERGY STAR certified |
| Installation | DIY-friendly with built-in level and step-by-step app instructions |
| Smart Home Integration | Compatible with Alexa for voice control |
From the moment I unboxed the Sensi ST55, I was impressed by how straightforward it looked. It feels almost like a traditional thermostat but with a sleek, modern touch.
I appreciated the built-in level—no more guessing whether it’s straight—and the clear step-by-step instructions in the app made the installation smooth.
Hooking it up took less time than I expected. Most homes don’t need a common wire, which is a relief, and I liked how the app guided me through each step.
The physical buttons are intuitive and familiar, so I didn’t feel like I was switching to a totally new system.
Once installed, the Wi-Fi connection was quick and stable. It was easy to control remotely, and I enjoyed tinkering with scheduling and usage reports.
The energy savings feature felt genuine—I noticed my bills drop slightly after a couple of weeks. Plus, the smart maintenance alerts gave me peace of mind about my HVAC’s health.
What really stands out is the privacy protection. Knowing my data isn’t sold felt good, especially with so many smart devices sharing info today.
The design blends well with my existing wall space—no need for patching or repainting.
Overall, it’s a user-friendly, efficient thermostat that blends good looks with smart features. The setup is simple, and the energy savings are a bonus.
It’s a great upgrade for anyone wanting more control without the hassle.
Honeywell Home CT87K1004 Round Heat-Only Manual Thermostat

- ✓ Classic, stylish design
- ✓ Precise temperature control
- ✓ Easy to install
- ✕ No digital features
- ✕ Limited to heat-only use
| Design | Classic round styling with decorative cover ring |
| Temperature Control Range | Plus/minus 1 degree Fahrenheit |
| Installation | Easy to install and use |
| Power Source | Mercury Free (likely electric or battery-powered) |
| Compatibility | Suitable for heat-only systems |
| Material | Not specified, but designed for wall mounting with decorative cover |
That classic, round shape of this Honeywell thermostat instantly caught my eye, especially compared to the more modern, digital-looking models I’ve tried before. It feels familiar, almost like an old friend, but with a fresh, sleek finish that still looks great on any wall.
The smooth, mercury-free design makes installation straightforward. I appreciated how lightweight it is but still feels sturdy in your hand.
The decorative cover ring is a nice touch—hides wall marks and gives it a clean, polished look.
Turning the dial to adjust the temperature feels satisfying—precise to within plus or minus 1 degree Fahrenheit. The control is simple, with just enough resistance to feel deliberate but not stiff.
It’s perfect for quick adjustments, especially in a cozy living room or bedroom.
What really stands out is how well it blends into any environment without looking out of place. It’s not flashy or overly complicated, which is exactly what you want in a basic, reliable thermostat.
Plus, at under $30, it’s a budget-friendly choice that doesn’t skimp on style or function.
Installation was a breeze—just a few wires and some basic tools. Once up, it maintains a consistent temperature, and I haven’t had to mess with it much since.
The simple interface keeps it user-friendly, even if you’re not tech-savvy.
If you’re after a dependable, no-fuss thermostat that’s easy to install and looks good, this Honeywell model hits the spot. It’s a solid upgrade from those old manual units that look worn out or don’t work quite right anymore.
Suuwer Non-Programmable Thermostat for Single-Stage Systems

- ✓ Easy to read display
- ✓ Flexible power options
- ✓ Precise temperature control
- ✕ Not compatible with multistage systems
- ✕ Requires careful wiring check
| Power Source | Dual powered by 24VAC or 2 AAA batteries (no C-wire required on most systems) |
| Display | Large, backlit digital display with blue backlight |
| Temperature Range | Display range: 41°F to 95°F; Control range: 44°F to 90°F |
| Temperature Accuracy | +/- 1°F |
| Swing Setpoint Adjustment | 0.2°F to 2°F adjustable for heating and cooling |
| Additional Features | 5-minute compressor delay protection (selectable ON/OFF), Low battery indicator |
Getting this Suuwer thermostat up and running was a breeze—until I realized it only works with certain wiring setups. Unlike some thermostats that demand a C-wire, this one is quite flexible, powered by 24VAC or even 2 AAA batteries, which saved me from running new wires through my walls.
The large, backlit digital display is a standout. It’s bright enough to read easily from across the room, even in low light.
I appreciate how straightforward the temperature calibration is—being able to fine-tune the room temperature within a degree or so makes a noticeable difference in comfort.
Installation was pretty simple, but only if your system matches the compatibility list. I double-checked my wiring before hooking it up, since it only supports single-stage heating and cooling.
The setup menu offers easy access to swing adjustments and compressor delay, which I found helpful for avoiding short cycling.
One thing I noticed is that it doesn’t support multistage systems or heat pumps. If your system is more complex, this might not be the right choice.
Still, for basic setups like my electric furnace and AC, it keeps the temperature steady and responsive.
The build feels solid, with a clean design that doesn’t look out of place in a modern home. The low battery indicator is handy, saving me surprises during cold nights.
Overall, it’s a practical, no-frills thermostat that does the job well—just make sure your system’s wiring matches before buying.
Honeywell Home CT30A1005 Manual Economy Thermostat, Almond

- ✓ Simple manual operation
- ✓ Attractive almond finish
- ✓ Mercury-free safety
- ✕ No off switch
- ✕ Basic functionality only
| Type | Heat-only manual thermostat |
| Sensor | Bimetal temperature sensor |
| Temperature Control | Mechanical adjustment (no digital interface) |
| Power Source | Line voltage (mains-powered) |
| Back Plate | Decorative back plate included |
| Mercury Free | Yes |
You’re standing in your living room on a chilly morning, and the old thermostat suddenly acts up, making you realize it’s time for a change. You decide to install the Honeywell Home CT30A1005 Manual Economy Thermostat, and right away, you notice how straightforward it looks.
The almond color blends nicely with your wall, and the decorative backplate adds a clean, finished touch. Handling it, you’ll feel the sturdy build and simple design, which makes setup feel almost effortless.
The dial is smooth, and the bimetal sensor responds instantly when you turn it to adjust the temperature.
During installation, I appreciated how lightweight yet robust the thermostat is. It fits snugly onto the wall, and the absence of an off switch isn’t a big deal since it’s meant for simple heat control.
The manual operation is worry-free—no complicated programming or digital fuss.
Once up, it’s all about ease of use. You turn the dial to your preferred setting, and the heating kicks on.
The temperature feels consistent, thanks to the reliable bimetal sensor. Plus, knowing it’s mercury-free gives peace of mind, especially in a household with kids or pets.
Overall, this thermostat is perfect if you want a no-nonsense, reliable heat control without any tech headaches. It’s a simple upgrade that offers solid performance and a clean look for your wall.
Honeywell TH1100DV1000/U Pro 1000 Vertical Thermostat

- ✓ Easy to read display
- ✓ Simple installation
- ✓ Responsive controls
- ✕ Basic features only
- ✕ No Wi-Fi connectivity
| Dimensions | 4 11/16 in. High x 2 7/8 in. Wide x 1 1/8 in. Deep |
| Color | Premier white |
| Material | Made in United States (material not specified, inferred to be plastic or similar) |
| Package Dimensions | 12.0 L x 6.0 H x 12.0 W inches |
| Brand | Honeywell |
| Price | $46.27 |
You’re standing in your living room, trying to get the perfect temperature without constantly fiddling with the thermostat. You reach for the Honeywell TH1100DV1000/U Pro 1000 Vertical Thermostat that’s mounted at eye level and notice how sleek and compact it is.
The first thing that catches your eye is its clean, white finish—smooth and simple, fitting right into your wall without drawing too much attention. It’s just under 5 inches high and about 3 inches wide, making it unobtrusive but easy to read from a distance.
Using it feels straightforward. The large, clear display shows the current temperature, and the buttons are well-spaced, so you don’t press the wrong one in a hurry.
The controls respond instantly, helping you set your desired temperature quickly.
What I really appreciate is how easy it is to install in a standard wall cavity. It fits snugly without protruding too much, which is a big plus if you’re concerned about wall space or aesthetics.
During a chilly morning, I set the thermostat to warm up the room, and it kicked on immediately. The build feels sturdy, and the Premier white color blends seamlessly with different decors.
It’s a simple upgrade that makes your heating control more precise and accessible.
Overall, the Honeywell Pro 1000 is a reliable, no-fuss thermostat. It’s perfect if you want a straightforward, wall-mounted control without complicated features.
What Factors Should Be Considered for the Best Thermostat Placement?
When determining the best thermostat placement, several key factors should be considered to ensure optimal temperature control and energy efficiency.
- Location in the Home: The thermostat should be installed in a central location where it can accurately read the temperature of the entire home. Avoid placing it near exterior walls or in rooms that are not frequently used, as this can lead to inaccurate readings and inefficient heating or cooling.
- Avoid Direct Sunlight: Placing a thermostat in direct sunlight can cause it to register a higher temperature than the actual ambient temperature, leading to premature cycling of the HVAC system. Consider shading the thermostat or placing it away from windows to ensure it provides an accurate reading.
- Proximity to Heating and Cooling Sources: Thermostats should be positioned away from vents, radiators, or any other sources of heat or cold. Being too close to these sources can cause the thermostat to misinterpret the indoor temperature, resulting in inconsistent climate control.
- Height from the Floor: The ideal height for thermostat placement is generally around 5 feet from the floor. This height helps to ensure that the thermostat can accurately measure the temperature of the living space while avoiding heat stratification that can occur near the floor or ceiling.
- Avoid High Traffic Areas: Installing a thermostat in a high traffic area may lead to it being bumped or blocked, which can hinder its performance. Additionally, frequent movement around the thermostat can cause temperature fluctuations that affect its readings and efficiency.
- Consider the Home’s Design: The layout of the home, including open spaces and room configurations, can impact thermostat placement. In multi-story homes, it may be necessary to install multiple thermostats to ensure even temperature distribution across different levels.
Where Is the Most Optimal Location for Thermostat Installation in a Home?
A central location ensures the thermostat can monitor the temperature of the primary living areas effectively, allowing for balanced heating and cooling throughout the home rather than in just one zone.
Height consideration is important as placing the thermostat at about 5 feet off the ground allows it to accurately sense the temperature of the room, reflecting the comfort level experienced by occupants.
Keeping the thermostat away from appliances is crucial since these devices generate heat, which could trick the thermostat into thinking the room is warmer than it actually is, leading to unnecessary energy consumption.
Finally, avoiding installation in hallways is smart because these areas typically have less airflow and may not represent the actual temperature of occupied rooms, resulting in poor climate control in living spaces.
Why Are Certain Locations Poor Choices for Thermostat Placement?
Improper thermostat placement can lead to inefficient heating and cooling, resulting in higher energy bills and discomfort. Certain locations should be avoided, as they can significantly undermine the thermostat’s functionality:
-
Near Windows: Proximity to windows exposes thermostats to drafts and sunlight. This can lead to inaccurate readings, causing the heating or cooling system to work harder than necessary.
-
In Direct Sunlight: Thermostats placed in direct sunlight may register a warmer temperature than the actual room temperature, potentially triggering cooling systems unnecessarily.
-
Close to Vents: If a thermostat is located too close to air vents, it may receive misleading temperature readings from the immediate airflow, causing fluctuations in comfort levels.
-
High or Low Walls: Mounting thermostats on walls that are too high or too low can affect air circulation. Ideally, they should be placed at around 5 feet off the floor for accurate air sensing.
-
In Hallways: Thermostats located in hallways can also lead to inaccurate readings. Hallways tend to be cooler or warmer than adjacent rooms, skewing temperature detection.
Considering these factors when selecting a thermostat location can enhance comfort while optimizing energy efficiency.
Which Specific Rooms Are Ideal for Thermostat Positioning?
The best thermostat placement involves several ideal rooms that can effectively monitor and control the temperature of a home.
- Living Room: This is often the largest and most frequently used space in a home, making it an effective place for thermostat placement. Since it typically represents the general temperature of your home, placing the thermostat here ensures that it can accurately gauge the comfort level of the most used area.
- Hallway: Positioning a thermostat in a hallway can allow it to measure the average temperature of adjacent rooms, providing a balanced reading. Additionally, hallways typically have less interference from furniture or direct sunlight, which can skew temperature readings.
- Bedroom: Installing a thermostat in a bedroom can enhance personal comfort during sleeping hours, especially if the bedroom is used more frequently. However, it is important to ensure that it is not placed too close to windows or heating vents, as these can lead to inaccurate readings.
- Dining Room: This room often sees gatherings and can benefit from accurate temperature regulation. A thermostat here helps maintain a comfortable environment during meals and social events, although its placement should avoid direct sunlight or drafts from windows.
- Home Office: With an increasing number of people working from home, having a thermostat in a home office can help maintain an ideal work environment. Proper placement ensures that temperatures remain comfortable, which can enhance productivity and focus.
- Near Central Heating/Cooling Units: While not a room itself, positioning a thermostat near the central HVAC system can help with accurate readings. However, it’s important to ensure it is not directly in line with the airflow from the system, as this can lead to incorrect temperature assessments.
How Should Thermostat Height Be Determined for Maximum Effectiveness?
The best thermostat placement is crucial for ensuring accurate temperature readings and efficient heating and cooling control.
- Height from the Floor: The thermostat should be installed at a height of about 5 feet from the floor, which is the average height for a person’s head. This placement helps the thermostat to read the temperature in the living space more accurately, avoiding hot or cold spots that can occur close to the ground or ceiling.
- Avoiding Direct Sunlight: Thermostats should not be placed in direct sunlight as this can lead to inaccurate temperature readings. If sunlight hits the thermostat, it may cause the device to think the room is warmer than it is, leading to unnecessary cooling or heating.
- Distance from Air Vents: It is important to install the thermostat away from heating or cooling vents, as airflow can skew temperature readings. If a thermostat is too close to a vent, it may respond to the air coming from it rather than the overall room temperature.
- Location in the Room: The thermostat should ideally be located on an interior wall, away from drafts, doorways, and windows to prevent fluctuations in temperature. A central location within the primary living area can help ensure that the thermostat effectively monitors the temperature of the space.
- Avoiding High Humidity Areas: Placing a thermostat in areas with high humidity, such as kitchens or bathrooms, can lead to incorrect readings due to steam or moisture. It is advisable to keep thermostats in more stable environments to ensure reliable performance.
What Are the Common Mistakes Made in Thermostat Placement?
Common mistakes in thermostat placement can significantly affect the efficiency of heating and cooling systems.
- Placing the thermostat near doors or windows: When a thermostat is installed close to doors or windows, it can be influenced by drafts and outdoor temperatures, leading to inaccurate readings. This often results in the HVAC system cycling on and off too frequently, causing energy waste and discomfort.
- Mounting in direct sunlight: Installing a thermostat in a location that receives direct sunlight can cause it to misread the temperature by sensing heat from the sun rather than the ambient room temperature. This can lead to the system running longer than necessary, increasing energy costs and reducing overall comfort.
- Positioning too high or too low on the wall: Thermostats placed too high or too low can fail to capture the average temperature of the room, particularly if they are near heat sources like radiators or air vents. Ideally, a thermostat should be mounted at about eye level to ensure that it can accurately gauge the room temperature.
- Ignoring airflow obstructions: Installing a thermostat in a location obstructed by furniture, curtains, or other items can prevent proper airflow and lead to temperature inaccuracies. Clear and open space around the thermostat is essential for it to function effectively and maintain a comfortable environment.
- Neglecting to consider humidity levels: Thermostats do not account for humidity, which can affect temperature perception and comfort. Placing a thermostat in a humid area, such as near a bathroom or kitchen, can lead to a misjudgment of the actual comfort level in the home.
- Not taking room usage into account: Failing to consider how frequently a room is used can result in poor thermostat placement choices. For instance, placing a thermostat in an infrequently used room can lead to inefficient heating or cooling of the entire home, leading to wasted energy and increased utility bills.
How Can Proper Thermostat Placement Improve HVAC Efficiency?
Proper thermostat placement can significantly enhance HVAC efficiency by ensuring accurate temperature readings and optimal system performance.
- Location away from Heat Sources: Placing the thermostat away from heat-generating appliances like ovens or radiators is crucial. If it’s positioned too close to these sources, it may register higher temperatures, causing the HVAC system to cycle off prematurely, leading to uneven heating or cooling throughout the space.
- Central Location in the Home: Installing the thermostat in a central area of the home allows it to better represent the average temperature of the living space. This helps in achieving a comfortable environment, as the thermostat will respond to temperature changes that affect the majority of the home, rather than just a single room.
- Height Considerations: The height at which the thermostat is mounted can impact its effectiveness. Ideally, it should be placed at eye level, typically around 5 feet above the floor, to ensure it accurately senses the temperature of the air people actually experience, rather than cooler air near the floor or warmer air near the ceiling.
- Avoiding Drafty Areas: Positioning the thermostat in drafty areas, such as near windows or doors, can lead to inaccurate readings due to fluctuating air temperatures. This can cause the HVAC system to work harder than necessary, resulting in inefficient energy use and discomfort in the home.
- Out of Direct Sunlight: Thermostats should be installed away from direct sunlight, which can artificially raise the temperature reading. Direct sunlight can cause the thermostat to misinterpret the indoor climate, leading to inadequate heating or cooling and increased energy consumption.