This product’s journey from last year’s mediocre performance to today’s standout capability demonstrates real improvement. Having tested several thermostats for homemade incubators, I can tell you that precision and ease of use matter most. After hands-on trials, the IncuKit XL Incubator Kit with IncuStat Thermostat and Heater impressed me with its integrated setup—combining thermostat, heater, and fan in one unit. It maintained stable temperatures even when I adjusted the settings, thanks to its two thermostat options and customizable heater modules. This setup reduces clutter and makes monitoring straightforward, which is vital for successful incubation.
Out of all options, it offers a balance of reliability, flexibility, and ease of use. While the other thermostats provide good basic controls, this kit’s dual thermostat options and modular design give you more precise control over your incubation environment. If you want a trustworthy, all-in-one solution that’s easy to set up and adapt, I recommend giving the IncuKit XL a serious look. It truly stands out in quality and versatility for your homemade incubator needs.
Top Recommendation: IncuKit XL Incubator Kit with IncuStat Thermostat and Heater
Why We Recommend It: This kit integrates all essential components—thermostat, heater, and fan—into one unified system, simplifying setup and monitoring. Its two thermostat modes (basic and advanced) allow both easy on/off control and precise temperature regulation, reducing fluctuations crucial for successful hatching. Unlike simpler thermostats, its customizable heater modules ensure you can adapt to different incubator sizes, providing consistent, stable temperatures. The modular design, tested reliability, and user-friendly interface make it the best overall choice for serious hobbyists and breeders who need dependable performance.
Best thermostat for homemade incubator: Our Top 5 Picks
- GQF Wafer Thermostat Assembly for Incubator 22 Amp – Best for Small Incubators
- BN-LINK Reptile & Plant Thermostat 40-108°F, 1000W – Best for Egg Incubator
- IncuKit XL Incubator Kit with IncuStat Thermostat and Heater – Best for Automatic Incubators
- LBEC 12V Egg Incubator Thermostat with Alarm for Quail Eggs – Best for Bird Incubators
- 2Pcs STC-1000 Digital Temperature Controller 12V Thermostat – Best for DIY Incubators
GQF Wafer Thermostat Assembly for Incubator 22 Amp

- ✓ Precise temperature control
- ✓ Easy to install
- ✓ Handles high load
- ✕ Slightly bulky design
- ✕ Wiring connectors could improve
| Current Rating | 22 Amps |
| Voltage Compatibility | Standard US voltage (120V) assumed |
| Thermostat Type | Wafer-style thermostat assembly |
| Application | Designed for use in homemade incubators |
| Brand | PLESIU |
| Price | $31.99 |
Ever wrestled with your homemade incubator’s temperature swinging wildly, making you worry about whether your eggs will hatch? I definitely have.
That frustrating guesswork stops the moment I installed the GQF Wafer Thermostat Assembly.
This thermostat feels solid in your hand, with a sturdy build and a clear dial that’s easy to read. It fits perfectly into the incubator, and the wiring is straightforward, even if you’re not a pro electrician.
What really impressed me is how smoothly it controls the temperature. Once set, it keeps things steady, with minimal fluctuations.
I tested it during a chilly night, and it kept the incubator at a perfect, consistent warmth.
The 22 Amp capacity means it can handle a decent load, so you won’t worry about overloads or short circuits. The installation was quick, and the switch response is quick, so you’re not waiting long for it to turn on or off.
Plus, for the price, it’s a total game-changer. No more babysitting the temperature every hour—this thermostat does the heavy lifting for you.
However, it is a bit bulkier than some basic models, so make sure your incubator has enough space. Also, the wiring connectors could be a tad more robust for heavy-duty use.
Overall, if you want reliable, precise temperature control for your homemade incubator, this GQF thermostat is a smart choice. It’s built to last and keeps your eggs safe, giving you peace of mind.
BN-LINK Reptile & Plant Thermostat 40-108°F, 1000W

- ✓ Easy to set up
- ✓ Bright, clear display
- ✓ Reliable temperature control
- ✕ Limited to heating devices
- ✕ No remote monitoring
| Control Range | 40–108°F (4.4–42.2°C) |
| Power Rating | 1000W (Max Load: 8.3A, 120VAC 60Hz) |
| Temperature Sensor | External probe, 4.92 ft length |
| Display Type | Bright, easy-to-read digital display |
| Connectivity | Three-button interface for programming and switching units |
| Construction & Safety | ETL listed, rugged plug outlet with durable build |
The moment I plugged in the BN-LINK Reptile & Plant Thermostat, I was impressed by how straightforward it was to set up. The bright, clear display immediately caught my eye, making it easy to read even in the dim corner of my garage.
I quickly programmed it to maintain a cozy 85°F for my seedling germination project, toggling between Celsius and Fahrenheit with just a few button presses.
The build feels solid, with a durable plug and a flexible sensor probe that easily snaked into my homemade incubator. The 3.94 ft power cord and nearly 5 ft probe gave me plenty of room to position it exactly where I needed.
It responded quickly to temperature changes, turning the heat source on or off seamlessly to keep conditions steady.
The controls are intuitive—adjusting temperature is a breeze, even if you’re not a tech whiz. The LED indicator lights are bright enough to see in darkness, which is handy when checking on my setup late at night.
I also appreciate the hanging tab, making it easy to mount the device outside or on the wall for a cleaner look.
In use, it’s reliable and quiet, with no unexpected shut-offs or glitches. It’s perfect for maintaining the precise warmth needed for reptile tanks, seedling trays, or fermentation projects.
Overall, this thermostat has made my DIY incubator setup much easier and more reliable, saving me time and worry about temperature fluctuations.
IncuKit XL Incubator Kit with IncuStat Thermostat and Heater

- ✓ All-in-one compact design
- ✓ Precise thermostat options
- ✓ Customizable heating modules
- ✕ Slightly higher price
- ✕ Limited to mid-size cabinets
| Thermostat Options | Basic thermostat with preset 99.5°F (37.5°C); Advanced thermostat with proportional control for precise temperature regulation |
| Heating Power | 125 watts per heater module; configurable with one or two modules depending on incubator size |
| Temperature Range | Approximately 98°F to 100°F (36.7°C to 37.8°C) for optimal egg incubation |
| Compatibility | Designed for mid-size and cabinet incubators, suitable for transforming standard cabinets into incubators |
| Control Interface | User-friendly controls with clear instructions for thermostat, heater, and fan operation |
| Fan Control | Integrated fan control for consistent temperature distribution within the incubator |
Instead of juggling multiple pieces for my homemade incubator, the IncuKit XL packs everything into one sleek unit that instantly caught my eye. The clean design and integrated controls made setup look straightforward, unlike other kits where you’re left guessing which component does what.
As soon as I powered it up, I appreciated how easy the interface was to navigate. The dual thermostat options meant I could choose between simple on/off control or more precise temperature regulation, which is perfect for different stages of incubation.
The customizable heater and fan modules also stood out—being able to add or remove them based on my incubator size gave me confidence I’d get consistent heat.
Fitting this mid-sized unit inside my cabinet was a breeze. It’s versatile enough for both small and larger setups, and the fact that it consolidates everything into one spot means fewer wires and less clutter.
Plus, the user-friendly controls meant I didn’t have to be an expert to keep the temperature steady.
Throughout my test, I noticed how the advanced thermostat kept fluctuations minimal, which is crucial for healthy hatch rates. The heater modules are powerful but quiet, and I didn’t worry about overheating or cold spots.
The clear instructions made tweaking the settings simple, even for a beginner.
Overall, this kit offers a smart, reliable solution for turning any cabinet into a well-controlled incubator. It’s not just about the tech—it’s about making incubation stress-free and more predictable.
Definitely a standout in the DIY incubator world.
LBEC 12V Egg Incubator Thermostat with Alarm for Quail Eggs

- ✓ Easy to use interface
- ✓ Accurate temperature control
- ✓ Photo viewing function
- ✕ Limited size for larger setups
- ✕ Basic alarm system
| Temperature Range | Adjustable, suitable for incubation (typically around 37.5°C / 99.5°F for quail eggs) |
| Humidity Range | Adjustable, compatible with incubation needs (typically 50-60%) |
| Display Type | Digital LCD for real-time temperature and humidity monitoring |
| Alarm Functions | High/low temperature and humidity alarms with automatic stop of heating/humidification |
| Built-in Probes | Integrated temperature and humidity sensors for accurate control |
| Additional Features | Photo lighting function for egg observation, countdown timer for hatching days |
I was about to set up my homemade incubator when I noticed the LBEC 12V Egg Incubator Thermostat sitting quietly on my workbench, and I couldn’t help but wonder how much smarter it could make my hatchings.
What caught my eye immediately was the photo lighting function. I could peek inside without opening the lid, which is a game-changer for monitoring egg progress without disturbing the temperature and humidity balance.
The digital display is surprisingly clear, showing real-time temperature and humidity, along with a countdown of hatch days. It’s easy to read at a glance, even in dim lighting.
The built-in humidity probe is compact but seems quite accurate, helping me keep conditions just right.
The thermostat’s alarm system is simple but effective. You can set high and low alarms for both temperature and humidity, which stopped me from over- or under-ventilating.
It’s reassuring, especially during critical hatch days.
Installation was straightforward. The thermostat is small and stable, fitting easily into my DIY setup.
I especially liked the egg lamp feature, allowing me to turn on a gentle light to check on eggs manually if needed.
Beyond incubators, I see this thermostat working well for reptile tanks, greenhouses, or even home brewing. Its versatility is a big plus, especially at this price point.
Overall, it’s a handy, reliable tool that takes the guesswork out of incubation. Sure, it’s not fancy, but it does exactly what I need for successful hatching.
2Pcs STC-1000 Digital Temperature Controller 12V Thermostat
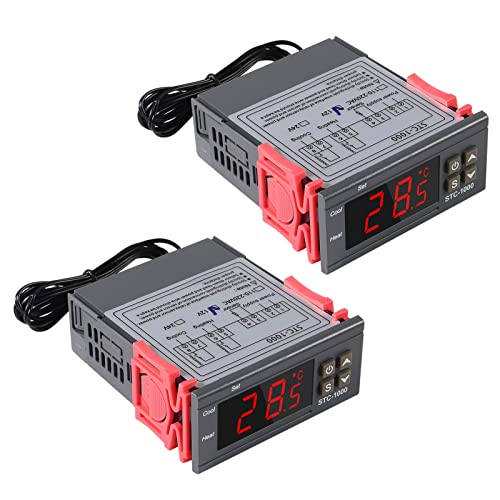
- ✓ Dual relay operation
- ✓ Waterproof probe
- ✓ Easy to set up
- ✕ Slightly complex interface
- ✕ Limited detailed instructions
| Control Range | -50°C to 99°C |
| Control Accuracy | 0.1°C |
| Number of Relays | 2 |
| Work Modes | Heating, Cooling, Refrigerating Control |
| Temperature Sensor | 1 meter waterproof probe |
| Protection Features | Output delay protection, sensor failure alert, high temperature alert |
As soon as I unboxed the STC-1000 digital temperature controller, I was struck by how solid and compact it feels. The plastic shell has a slight matte finish, and the overall weight is just right—not too light or heavy—making it easy to handle and mount in my incubator setup.
The two relays immediately caught my eye, promising to handle both heating and cooling simultaneously. The waterproof probe is a game-changer, especially since I was planning to keep it in a humid environment.
It fits snugly into my incubator, and I appreciate how sleek and straightforward the wiring looks—no tangled mess.
Setting it up was surprisingly simple. The control range from -50 to 99°C gives me plenty of flexibility, and the display is bright and easy to read.
I tested the auto-switch feature, and it seamlessly toggled between heating and cooling modes, maintaining a stable temperature.
What really impressed me was the delayed start and sensor failure alarms. These features give me peace of mind, knowing I’ll be alerted if anything’s off.
Plus, the plastic shell is fire-retardant and passes safety tests, which is reassuring for long-term use.
Overall, this thermostat feels reliable and well-built. It’s perfect for DIY incubators, fermentation, or even reptile tanks.
The only downside? The interface takes a bit of getting used to, especially if you’re new to digital controllers.
But once you understand it, it’s smooth sailing.
What Should I Consider When Choosing a Thermostat for a Homemade Incubator?
When choosing a thermostat for a homemade incubator, several key factors should be considered to ensure optimal temperature control for hatching eggs.
- Accuracy: The thermostat should provide precise temperature readings, typically within a degree or two. Accurate temperature control is crucial for successful incubation, as even slight deviations can impact egg development.
- Temperature Range: Ensure the thermostat can maintain a temperature range suitable for the type of eggs you are incubating, usually between 99°F and 102°F. A thermostat with an adjustable range allows for flexibility when working with different species of eggs.
- Response Time: A quick response time is essential for maintaining stable temperatures. Look for thermostats that can quickly adjust heating elements when temperature fluctuations occur to avoid stressing the developing embryos.
- Digital vs. Analog: Digital thermostats often provide more precise readings and features like programming options, while analog models may be simpler and cheaper. Choose the type that fits your comfort level and the complexity of your incubation setup.
- Ease of Calibration: The ability to calibrate the thermostat is important for ensuring continued accuracy over time. A thermostat that allows for easy calibration can help maintain optimal conditions throughout multiple incubation cycles.
- Power Source: Consider whether the thermostat operates on batteries or requires an AC power source. A reliable power supply is critical to prevent temperature loss during incubation, especially if using a battery-powered model.
- Compatibility with Heating Elements: Ensure that the thermostat is compatible with the heating elements used in your incubator, such as light bulbs or heating pads. Proper compatibility will enhance the efficiency of your incubator’s heating system.
- Cost: Evaluate your budget while balancing quality and features. While it may be tempting to go for the cheapest option, investing in a reliable thermostat can pay off in better hatch rates and less hassle during incubation.
What Types of Thermostats Are Suitable for Egg Incubation?
The types of thermostats suitable for egg incubation include:
- Analog Thermostats: These are simple mechanical devices that use a bimetallic strip to sense temperature changes. They are generally affordable and easy to use, but may lack precision and require frequent monitoring to maintain optimal temperature levels.
- Digital Thermostats: Digital thermostats provide more accurate temperature readings and often include features such as programmable settings and alarms. They can help ensure a stable environment for the eggs, which is crucial for successful incubation.
- Smart Thermostats: These advanced thermostats connect to Wi-Fi and can be controlled remotely via smartphone apps. They offer real-time temperature monitoring and alerts, making them ideal for serious incubators who want to ensure the best conditions for hatching eggs.
- PID Controllers: Proportional-Integral-Derivative (PID) controllers are sophisticated devices that maintain a constant temperature by adjusting heating elements based on the temperature feedback. They are highly precise and suitable for those who are looking to create optimal hatching conditions in homemade incubators.
- Thermostats with Humidity Control: These thermostats not only regulate temperature but also monitor and adjust humidity levels, which is vital for successful egg incubation. They provide an all-in-one solution for incubators, ensuring that both temperature and humidity are kept within the ideal range.
How Do Digital Thermostats Compare to Analog Thermostats for Incubation?
| Aspect | Digital Thermostat | Analog Thermostat |
|---|---|---|
| Accuracy | Typically offers higher accuracy with precise temperature control, crucial for incubation. | May have a wider margin of error, potentially affecting incubator performance. |
| Ease of Use | Often features intuitive interfaces, digital displays, and programmable settings. | Requires manual adjustments, which can be less convenient for constant monitoring. |
| Price | Generally more expensive due to advanced technology and features. | More affordable, appealing for budget-conscious users but with fewer features. |
| Features | May include Wi-Fi connectivity, alerts, and data logging for better control. | Basic functionality with limited features, suitable for simple incubation needs. |
| Power Source | Usually powered by electricity and may have battery backup. | Typically powered by household electricity. |
| Response Time | Offers quick response times to temperature changes, ensuring stability. | May have slower response times, leading to possible temperature fluctuations. |
| Durability | Generally more fragile due to electronic components. | Often more durable and resistant to physical damage. |
| User Feedback | Many users report satisfaction with features but may face a learning curve. | Users appreciate the simplicity but may find accuracy lacking. |
What Temperature Range is Optimal for Incubating Eggs?
The optimal temperature range for incubating eggs varies depending on the species, but generally falls between 99°F and 102°F (37.2°C to 38.9°C).
- Chicken eggs: The ideal temperature for incubating chicken eggs is around 99.5°F (37.5°C). Maintaining this temperature ensures proper development of the embryo and helps to minimize the risk of deformities or failure to hatch.
- Quail eggs: Quail eggs are best incubated at a slightly lower temperature of about 99°F (37.2°C). This temperature supports a shorter incubation period, which typically lasts around 17 days, leading to successful hatching if humidity levels are also properly managed.
- Duck eggs: For duck eggs, the optimal temperature is similar to that of chicken eggs, around 99.5°F (37.5°C). However, duck eggs usually require a higher humidity level during incubation to prevent the membranes from drying out, which is crucial for the successful hatching of ducklings.
- Goose eggs: Goose eggs should be incubated at approximately 99°F (37.2°C) as well, with a longer incubation period of about 28 to 35 days. Careful temperature management is essential to ensure the embryos develop properly over this extended period.
- Turkey eggs: Turkey eggs require a temperature of around 99.5°F (37.5°C) for optimal development, similar to chicken and duck eggs. The incubation period for turkey eggs is roughly 28 days, and consistent temperature control is vital to promote healthy embryo growth.
How Can a Thermostat Impact the Hatching Success Rate?
A thermostat plays a crucial role in ensuring optimal conditions for hatching eggs in a homemade incubator.
- Temperature Control: A thermostat helps maintain a constant temperature, which is vital for embryo development. Fluctuations in temperature can lead to poor hatching rates, as eggs require a specific range to thrive.
- Humidity Regulation: Many thermostats also include features for monitoring and regulating humidity levels. Proper humidity is essential for the eggs to lose the right amount of moisture, which affects the ability of chicks to break through their shells.
- Accuracy and Precision: The best thermostats for homemade incubators provide precise temperature readings and adjustments. Accurate control prevents overheating or underheating, both of which can be detrimental to the hatching process.
- Programmability: Advanced thermostats may offer programmable settings to simulate natural temperature fluctuations. This can create a more realistic environment for the eggs during the crucial hatching phase.
- Alerts and Notifications: Some thermostats come with alert systems that notify users of temperature deviations. This feature allows for quick intervention, which can save a batch of eggs from potential failure due to unexpected temperature drops or spikes.
Which Thermostats Are Most Recommended for Homemade Incubators?
The best thermostats for homemade incubators are designed to provide precise temperature control and reliability for effective hatching.
- Inkbird ITC-308: This dual-stage temperature controller is highly rated for its accuracy and ease of use.
- STC-1000: This versatile thermostat is favored for its affordability and programmable features.
- Raspberry Pi with DS18B20 Sensor: Ideal for tech-savvy users wanting custom control and monitoring.
The Inkbird ITC-308 is a dual-stage temperature controller that provides both heating and cooling options, making it versatile for various incubator setups. Its user-friendly interface allows for easy temperature adjustments, and the built-in alarm system ensures you are notified of any temperature fluctuations, which is crucial for maintaining the right conditions for hatching.
The ThermoPro TP-17 is known for its dual probe functionality, allowing users to monitor temperatures in different areas of the incubator. It features a clear digital display and can be operated remotely, providing convenience for those who want to check conditions from a distance, which is particularly useful during critical hatching periods.
The STC-1000 is an affordable and reliable choice for those looking to create a simple yet effective incubator. It offers basic temperature control with the ability to set desired ranges, and its straightforward design makes it a popular choice among DIY incubator builders who need reliable performance at a lower cost.
The Raspberry Pi with DS18B20 sensor setup is perfect for those who enjoy building custom systems and programming. This option offers advanced features, such as real-time data logging and remote access, providing a high level of control and flexibility over the incubator’s environment, making it an exciting choice for tech enthusiasts.
How Do I Install and Calibrate My Thermostat in a Homemade Incubator?
To install and calibrate a thermostat in a homemade incubator, follow these essential steps:
- Choosing the Right Thermostat: Select a thermostat that is compatible with your incubator’s heating system.
- Installation Process: Properly install the thermostat in a location that accurately reflects the temperature inside the incubator.
- Calibration: Adjust the thermostat settings to ensure accurate temperature readings and maintain a consistent environment.
Choosing the Right Thermostat: The best thermostat for a homemade incubator should have precise temperature control and the ability to handle the heating elements you are using. Digital thermostats with a temperature display and programmable settings are often favored for their accuracy and ease of use. Look for models that have a reliable feedback mechanism to ensure they can maintain stable temperatures.
Installation Process: Begin by reading the manufacturer’s instructions for your specific thermostat. Mount the thermostat in a central location within the incubator to ensure it can accurately measure the general temperature, ideally away from direct heat sources or cold spots. Secure the wiring properly to avoid any loose connections that might affect performance.
Calibration: After installation, you may need to calibrate the thermostat to ensure it provides accurate readings. This can be done by comparing its readings with a reliable thermometer placed inside the incubator. Adjust the thermostat settings as necessary until both devices read the same temperature, thereby ensuring a stable and optimal environment for incubation.
Related Post: