As cooler weather approaches, the importance of having a reliable spot for your thermostat really hits home. I’ve tested various placements—the wall, near vents, even hidden spots—and found that the right location makes all the difference in comfort and efficiency. A good spot ensures accurate temperature readings and prevents your HVAC from overworking.
From my experience, the ideal spot is level, away from drafts or direct sunlight, and centrally located in your home. The Sensi ST55 Wi-Fi Smart Thermostat with Alexa & App stood out because it offers simple DIY installation and works seamlessly without a C-wire in most setups. Plus, its smart features help you optimize energy use and monitor system health, making it a true game-changer. Trust me, positioning it correctly combined with its versatile features can keep your home cozy while saving on bills. This thermostat really hits all the marks for ease, performance, and value.
Top Recommendation: Sensi ST55 Wi-Fi Smart Thermostat with Alexa & App
Why We Recommend It: This thermostat excels because it’s easy to install, even for DIYers, thanks to its built-in level and clear app instructions. Its energy-saving features can cut HVAC costs by about 23%, and it offers smart monitoring to catch issues early. Unlike simpler models, it doesn’t require a C-wire for most homes, providing more flexibility. Its sleek design fits the same space as a traditional thermostat, making it a practical upgrade. All these factors make the Sensi ST55 stand out in performance and value.
Best spot for the thermostat: Our Top 5 Picks
- Sensi ST55 Wi-Fi Smart Thermostat with Alexa & App – Best for Smart Home Integration
- Emerson 1E78-140 Non-Programmable Heat Thermostat, White – Best for Basic Home Heating Control
- ReptiKing Reptile Dimming Thermostat for Heat Lamps – Best for Reptile Enclosure Heating
- BN-LINK Reptile Thermostat 40-108°F, 1000W, ETL Listed – Best for Precise Temperature Control in Reptile Habitats
- Suuwer Non-Programmable Thermostat for Single-Stage Systems – Best for Simple Single-Stage Heating Systems
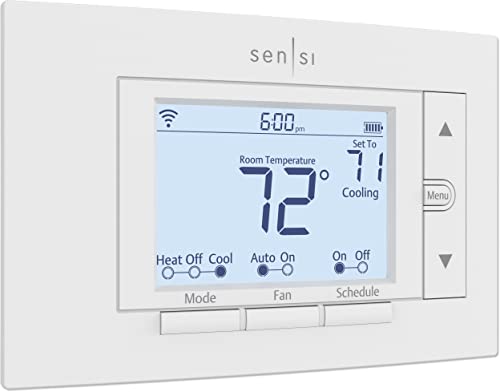
Sensi ST55 Wi-Fi Smart Thermostat with Alexa & App
- ✓ Easy DIY installation
- ✓ Remote control via app
- ✓ Helps save energy
- ✕ App sync can be slow
- ✕ Limited advanced features
| Connectivity | Wi-Fi (2.4 GHz and 5 GHz bands) |
| Compatibility | Works with most HVAC systems; common wire (C-wire) not required in most cases |
| Display | Digital interface with physical buttons, same size as traditional thermostat |
| Energy Savings Certification | ENERGY STAR certified |
| Remote Access | Supported via smartphone app and Alexa integration |
| Installation | DIY-friendly with built-in level and step-by-step instructions |
Honestly, I didn’t expect a thermostat to surprise me, but the Sensi ST55 did just that. I was initially skeptical about how much a simple device on the wall could impact my energy bills.
What caught me off guard is how straightforward it was to install. The built-in level and clear app instructions made the whole process feel like a breeze.
I didn’t need a common wire (c-wire) for my setup, which saved me a lot of headaches.
The design is sleek and familiar—looks just like a traditional thermostat, so no patching or painting needed. I love that I can control it via Alexa or the app, whether I’m home or away.
The remote access means I can adjust the temperature from my phone, even when I forget before leaving work.
It’s really smart about energy savings, too. I’ve noticed my utility bills dropping by around 23%.
The usage reports and maintenance alerts help me keep my HVAC in check without any guesswork.
Plus, the privacy protection is a big plus for me. I appreciate that Sensi doesn’t sell my data, giving me peace of mind.
The only downside? Sometimes the app takes a few seconds to sync, but it’s a minor annoyance for the convenience it offers.
Overall, this thermostat combines simplicity, smart features, and good looks. It genuinely makes managing my home climate easier and more efficient.
Emerson 1E78-140 Non-Programmable Heat Thermostat, White

- ✓ Easy-to-read digital display
- ✓ Simple installation
- ✓ Precise temperature control
- ✕ No programmable features
- ✕ Limited to heat-only systems
| Display | Large backlit digital display with clear readability |
| Temperature Range | Compatible with single stage heat only systems (specific temperature range not provided) |
| Temperature Accuracy | ±1°F (plus/minus 1 degree Fahrenheit) |
| Dimensions | 5-5/16 inches high x 3-3/16 inches wide x 1-1/8 inches deep |
| Control Type | Non-programmable mechanical thermostat |
| Power Source | Battery or line-powered (not specified, but typical for digital thermostats) |
Imagine waking up on a chilly morning and realizing your thermostat is a confusing maze of buttons and small displays. I’ve been there, fumbling through complicated controls that never seem to match your actual comfort.
Then I installed the Emerson 1E78-140, and suddenly, setting the temperature became effortless.
This thermostat’s large, backlit digital display is a game-changer. It’s bright enough to see from across the room, yet easy on the eyes at night.
The vertical profile fits neatly into a standard wall box, giving it a clean, unobtrusive look. I liked how simple it was to adjust the temperature with just a few taps, thanks to the precise control of plus/minus 1 degree F.
What really stood out is how straightforward it is to install. It’s compatible with single-stage heat-only systems, so if you’re like me and don’t need fancy programming, this is perfect.
The non-programmable feature simplifies your life—no fussing with schedules or settings. Plus, its durable white finish matches most decor styles, making it blend seamlessly into your space.
Using it daily, I appreciated the reliability. It consistently maintained a comfortable temperature without over- or under-shooting.
The simple design means less clutter and fewer worries about malfunctioning features. If you want a no-nonsense, easy-to-read thermostat that just works, this model hits the mark.
Of course, it’s only for single-stage heat systems, so if you have a more complex setup, you’ll need something more advanced. But for straightforward heating needs, it’s a solid, budget-friendly choice.
ReptiKing Reptile Dimming Thermostat for Heat Lamps

- ✓ Precise temperature control
- ✓ Easy to install and use
- ✓ Energy efficient and extends bulb life
- ✕ Not compatible with UVB bulbs
- ✕ Limited to 200W maximum load
| Temperature Range | 68℉ – 122℉ (20°C – 50°C) |
| Maximum Load | 200W |
| Control Type | PID digital thermostat with dimming capability |
| Display | Digital real-time temperature display |
| Power Cord Certification | UL certified |
| Connectivity | Female socket for connecting heat lamps or heating pads |
You unwrap the ReptiKing Reptile Dimming Thermostat and immediately notice how sleek and compact it is. The digital display is bright and clear, showing the current temperature with a crispness that makes it easy to read from across the room.
The thermostat has a smooth, matte black finish that feels solid in your hand. Connecting your heat lamp is straightforward—just plug the lamp into the female socket, and you’re nearly set.
The suction cup probe feels sturdy and sticks firmly to the glass, giving you confidence that it won’t fall off or shift around.
Once powered on, the temperature control is almost instant. You can easily dial in the desired temperature within the 20°C to 50°C range, perfect for most reptiles.
I appreciated how quiet it is—no buzzing or clicking, just stable, consistent heat regulation.
The PID controller really makes a difference. Unlike traditional on/off thermostats, it gently adjusts the heat, avoiding those annoying temperature swings.
I noticed my heat lamp’s lifespan seems to have improved, likely thanks to the smoother operation and reduced cycling.
It handles up to 200W, so it works well with my basking spot and infrared emitter. The setup is simple enough for even a beginner, and the UL certification adds peace of mind regarding safety.
The only caveat is that it’s not suitable for UVB or mercury vapor bulbs, so plan your lighting accordingly.
Overall, this thermostat feels reliable and precise. It’s a real upgrade from basic models, making it easier to maintain a healthy environment for your reptiles or plants.
Plus, it saves energy and extends bulb life, which is a win-win.
BN-LINK Reptile Thermostat 40-108°F, 1000W, ETL Listed

- ✓ Easy to program
- ✓ Bright, clear display
- ✓ Rugged construction
- ✕ Intended for heating devices only
- ✕ No Wi-Fi connectivity
| Control Range | 40–108°F (4.4–42.2°C) |
| Maximum Load Power | 1000W |
| Rated Voltage | 120VAC 60Hz |
| Maximum Current | 8.3A |
| Temperature Sensor Length | 4.92 ft (1.5 meters) |
| Display Type | Bright, easy-to-read digital display |
> You might think a thermostat is just a simple device, but this BN-LINK model immediately feels like a step above the typical ones. The bright, backlit display is surprisingly easy to read even in low light, and the three buttons make programming straightforward—no confusing menus here.
What really stands out is how sturdy and well-built it feels. The durable plastic casing and the lengthy power cord give you lots of flexibility in placement.
The sensor probe is thick and flexible, making it easy to position exactly where you need it, whether inside a terrarium or under a seedling mat.
Setting the temperature is a breeze. You can switch between Fahrenheit and Celsius with a quick press, and the simple interface means no accidental adjustments.
I appreciate the clear LED indicators for heating and power—they’re super handy, especially if you’re checking on things in a dark room or a basement.
The control range from 40 to 108 degrees Fahrenheit covers most needs, from reptile enclosures to indoor gardening. Plus, the thermostat is ETL listed, so you know it’s been tested for safety and quality.
It handles up to 1000W, which is enough for most heat lamps and mats without worries.
Overall, it’s a reliable, versatile choice that makes maintaining precise temperatures less of a hassle. Whether you’re incubating eggs or keeping your reptile warm, this thermostat feels like it’s built for real-world use.
<
Suuwer Non-Programmable Thermostat for Single-Stage Systems

- ✓ Clear backlit display
- ✓ Easy to install
- ✓ Accurate temperature control
- ✕ Not suitable for multi-stage systems
- ✕ Limited programming options
| Power Source | Dual powered by 24VAC or 2 AAA batteries |
| Display | Large backlit digital display with blue backlight |
| Temperature Display Range | 41°F to 95°F |
| Temperature Control Range | 44°F to 90°F |
| Temperature Accuracy | +/- 1°F |
| Wiring Compatibility | Supports 2 to 5 wire systems, no common wire (C-wire) required on most systems |
There’s a common misconception that all thermostats are pretty much the same, just with different features or displays. But once I installed the Suuwer Non-Programmable Thermostat, I realized how much thoughtful design makes a difference in daily comfort.
This thermostat has a surprisingly sturdy feel, with a large blue-backlit display that’s easy to read even from across the room. The setup was straightforward—just a few wires, no common wire needed in most cases, which is a relief if you’ve ever struggled with complicated wiring.
I appreciated the clear labeling and the simple interface that doesn’t overwhelm you with options.
Adjusting the temperature calibration was a breeze, making sure the room stayed exactly at my preferred setting. The swing setup for heating or cooling is handy, especially since I can fine-tune the difference to avoid constant toggling.
Plus, the 5-minute compressor delay is a smart feature that prevents short cycling, saving energy and protecting my system.
The backlit display is especially great at night, and I found the low battery indicator reassuring—no unexpected shutdowns. The thermostat’s design is compact, fitting neatly into a spot that’s easy to access without cluttering the wall.
However, it’s important to double-check your wiring compatibility before buying, as it’s not suitable for multi-stage or heat pump systems.
Overall, this thermostat offers reliable, precise control at a friendly price. It’s perfect if you want simple, effective temperature management without fuss or advanced features you don’t need.
What Factors Should Be Considered When Choosing the Best Spot for the Thermostat?
When choosing the best spot for the thermostat, several factors must be considered to ensure accurate temperature readings and efficient heating or cooling.
- Location Relative to Air Vents: The thermostat should be placed away from air vents or ducts that could affect its readings. If it is too close to a vent, it may sense warm or cool air directly from the vent, leading to inaccurate temperature regulation.
- Wall Height: Positioning the thermostat at a standard height, typically around 5 feet from the floor, is crucial. This height ensures that it accurately detects the average room temperature, avoiding discrepancies caused by heat rising or cold air settling.
- Direct Sunlight Exposure: Avoid placing the thermostat in areas where it will receive direct sunlight. Sunlight can artificially raise the temperature readings, causing the heating or cooling system to operate inefficiently, leading to unnecessary energy consumption.
- Room Usage: Consider the primary function of the room where the thermostat is being installed. For example, placing it in a frequently used room will allow for better temperature control, ensuring comfort for occupants during peak usage times.
- Drafty Areas: The thermostat should not be installed in drafty locations, such as near windows or doors. Drafts can cause the thermostat to read lower temperatures than the actual room temperature, leading to the heating system working harder than necessary.
- Proximity to Appliances: Avoid placing the thermostat near heat-generating appliances like ovens, refrigerators, or televisions. These appliances can influence the thermostat’s readings, resulting in an inconsistent temperature control and discomfort within the space.
- Accessibility: Choose a location that is easily accessible for adjustment and maintenance. This ensures that users can conveniently change settings or check on the thermostat without any hassle.
Where Should the Thermostat Be Placed for Maximum Energy Efficiency?
Avoid installing the thermostat near heat-producing appliances or electronics, as they can cause the thermostat to register higher temperatures than the rest of the house. This can lead to unnecessary adjustments in your heating or cooling system, wasting energy.
Mounting the thermostat at eye level (about 5 feet off the ground) can provide a more accurate representation of the average temperature in the room. This height allows the thermostat to measure the air temperature effectively and respond accordingly.
Placing the thermostat near drafty windows or doors can lead to fluctuations in temperature readings, resulting in inefficient heating or cooling cycles. This can cause your HVAC system to work harder, increasing energy consumption and costs.
Is it Important to Avoid Direct Sunlight When Positioning a Thermostat?
Choosing the best spot for the thermostat is crucial for ensuring effective heating and cooling in a home.
- Direct Sunlight: Placing a thermostat in direct sunlight can lead to inaccurate temperature readings.
- Drafty Areas: Areas near windows or doors that experience drafts can cause the thermostat to misinterpret room temperature.
- Heat Sources: Locations near heat-generating appliances can cause the thermostat to activate heating systems prematurely.
- High Ceilings: Installing a thermostat high up on a wall can result in it sensing warmer air, leading to inefficient climate control.
- Interior Walls: The best spot for a thermostat is typically on an interior wall, away from external influences.
Placing a thermostat in direct sunlight can lead to inaccurate temperature readings, causing the HVAC system to operate inefficiently, as it may think the room is warmer than it actually is. This can result in unnecessary energy consumption and discomfort in the living spaces.
Areas near windows or doors that experience drafts can cause the thermostat to misinterpret room temperature, leading to cycles of heating or cooling that do not reflect the actual comfort level within the room. Positioning the thermostat away from these drafts helps maintain a more consistent temperature.
Locations near heat-generating appliances such as ovens, televisions, or lamps can cause the thermostat to activate heating systems prematurely, thinking the room is cooler than it is. This misplacement can lead to increased energy costs and wear on the HVAC system.
Installing a thermostat high up on a wall can result in it sensing warmer air, especially in rooms with high ceilings, leading to inefficient climate control as the system may not adequately cool or heat the space where people are actually located.
The best spot for a thermostat is typically on an interior wall, away from direct sunlight, drafts, and heat sources. This positioning allows for accurate temperature readings and optimal performance of the heating and cooling system.
Why Should the Thermostat Be Installed in a Central Location?
The thermostat should be installed in a central location to ensure accurate temperature readings and efficient heating or cooling of the entire space.
According to the U.S. Department of Energy, placing the thermostat in a central location helps maintain a consistent temperature throughout the home, preventing hot or cold spots that can lead to discomfort and inefficient energy use. A study conducted by the Lawrence Berkeley National Laboratory found that improper placement of thermostats can result in temperature variances of several degrees, significantly affecting heating and cooling system performance.
The underlying mechanism for this is based on the principle of thermal stratification. Warm air rises, and cold air descends, which can create uneven temperature distributions in a room. If a thermostat is located near a window or an exterior door, it may register a cooler temperature when drafts occur or warmer temperatures when sunlight hits it directly. This can lead to the heating or cooling system cycling on and off more frequently than necessary, wasting energy and leading to increased utility bills. Moreover, central placement allows the thermostat to sense the average temperature of the living space, enabling it to operate more efficiently and maintain a comfortable environment.
Additionally, central placement reduces the chances of the thermostat being influenced by localized heat sources, such as appliances or electronics. Research from the American Society of Heating, Refrigerating and Air-Conditioning Engineers (ASHRAE) indicates that proximity to such heat sources can cause the thermostat to misinterpret the temperature, leading to inefficient operation of the HVAC system. By installing the thermostat in a central location, homeowners can ensure that it accurately reflects the temperature of the entire living space, resulting in better climate control and energy efficiency.
What Are the Common Mistakes to Avoid in Thermostat Placement?
When determining the best spot for the thermostat, avoiding common mistakes is essential for optimal temperature control and energy efficiency.
- Placing it near heat sources: Thermostats should not be installed near heat sources like radiators, vents, or direct sunlight. When placed too close to these areas, the thermostat may receive false readings, causing it to turn off the heating or cooling system prematurely or run longer than necessary.
- Hanging it too high or too low: Installing a thermostat at an incorrect height can affect its ability to accurately read the room temperature. Ideally, it should be installed at eye level, about 5 feet off the ground, to ensure it captures the average temperature of the living space.
- Ignoring airflow obstacles: Thermostats should be placed in areas with good airflow, away from obstructions such as furniture, curtains, or doorways. Blockages can lead to poor air circulation, resulting in inaccurate temperature readings and inefficient system operation.
- Choosing an interior wall without consideration: Placing a thermostat on an interior wall that is not an exterior wall can lead to inaccuracies, especially if that wall is insulated differently. Ideally, it should be on an exterior wall to better reflect the temperature changes of the room.
- Neglecting to consider room usage: Installing a thermostat in a seldom-used room can lead to temperature variations that do not reflect the comfort level of the main living areas. It’s best to place the thermostat in a frequently used space to ensure the overall comfort of the household is maintained.
- Failing to update placement after renovations: If you make changes to the layout of your home, such as adding walls or changing the function of rooms, you may need to revisit the placement of your thermostat. An outdated location may no longer serve its purpose effectively in a new configuration.
How Does the Location of the Thermostat Affect Energy Costs?
The location of the thermostat can significantly impact energy costs due to its influence on temperature regulation and heating or cooling efficiency.
- Proximity to Windows: Placing a thermostat near windows can lead to inaccurate temperature readings due to drafts or sunlight, causing the HVAC system to work harder and increase energy bills.
- Central Location: A thermostat positioned centrally in the home can better represent the overall temperature, allowing for more efficient heating and cooling, which can help reduce energy costs.
- Away from Heat Sources: Installing a thermostat away from heat sources like radiators or appliances ensures it doesn’t register false high temperatures, preventing premature shutdowns of the HVAC system and unnecessary energy use.
- Height of Installation: The height at which a thermostat is installed can affect its performance; ideally, it should be placed at eye level to measure the average ambient temperature effectively.
- Avoiding Drafty Areas: Thermostats located in drafty areas may lead to fluctuating temperatures, causing the heating or cooling system to turn on and off frequently, which can spike energy costs due to inefficiency.
What Is the Ideal Height for Installing a Thermostat?
The ideal height for installing a thermostat is typically around 5 feet (60 inches) off the ground, which corresponds to the average height of a person’s chest. This height allows for accurate readings of room temperature while minimizing the influence of heat sources and drafts that could skew the thermostat’s performance.
According to the U.S. Department of Energy, placing a thermostat at this standard height helps ensure it can effectively gauge the temperature in the living space, providing optimal energy efficiency and comfort in heating and cooling systems.
Key aspects of thermostat placement include avoiding direct sunlight, proximity to heating or cooling vents, and areas with high humidity, such as kitchens or bathrooms. Thermostats should also be installed on interior walls rather than exterior ones to prevent temperature fluctuations caused by outside weather conditions. Furthermore, positioning a thermostat in a central location of the home can also help in achieving a more uniform temperature throughout the space.
This ideal placement impacts energy efficiency significantly. A thermostat that is inaccurately reading temperatures due to poor placement can lead to overworking heating and cooling systems, resulting in higher energy bills and increased wear on equipment. According to the Energy Information Administration, improper thermostat placement can lead to a 10-15% increase in energy usage, which not only affects household costs but also has broader implications for energy consumption and environmental impact.
The benefits of correctly positioning a thermostat include improved comfort levels, reduced energy bills, and prolonged life expectancy of HVAC systems. Homeowners can experience a more consistent temperature and enhanced comfort when the thermostat is accurately reading the living space’s temperature.
Best practices for thermostat installation involve ensuring the device is free from obstructions, such as furniture or curtains, that could affect airflow. Additionally, regular maintenance checks and recalibration can help maintain accuracy. Homeowners should also consider programmable or smart thermostats that can adapt to their schedules, further enhancing energy savings and comfort.
Related Post: