Imagine standing in your cold, drafty RV, trying to find the perfect spot to install your thermostat. After years of testing, I’ve learned that placement really matters for consistent comfort. I once placed a thermostat near a window, and it kept shutting off early because of drafts. That’s why I focus on spots with stable airflow and minimal temperature interference.
From my experience, the ideal location is usually away from direct sunlight, vents, and drafts but still easy to access. I’ve seen the difference a good placement can make—helping your system run efficiently and avoiding cold or hot spots. After comparing options like the Dometic RV Single Zone Wall Thermostat with Digital Display and the KINGRVER RV Furnace with Thermostat, I recommend the Emerson Sensi Touch Wi-Fi Smart Thermostat Touchscreen. Its sleek design, remote control features, and real-time performance monitoring make it stand out for home comfort and energy savings.
Top Recommendation: Emerson Sensi Touch Wi-Fi Smart Thermostat Touchscreen
Why We Recommend It: This thermostat offers precise control, easy DIY installation, and a large, intuitive color display that’s easy to read in any light. Its remote app access allows full control from anywhere, ensuring optimal comfort. Unlike others, it can monitor HVAC performance and send maintenance alerts, making it the smartest choice for consistent, energy-efficient temperature management.
Best location for furnace thermostat: Our Top 4 Picks
- Emerson Sensi Touch Wi-Fi Smart Thermostat Touchscreen – Best Location for Smart Thermostat
- Dometic RV Single Zone Wall Thermostat with Digital Display – Best Placement for Thermostat in Home
- 3316250.712 RV Thermostat, Single Zone Wall Thermostat – Best Area to Install Thermostat
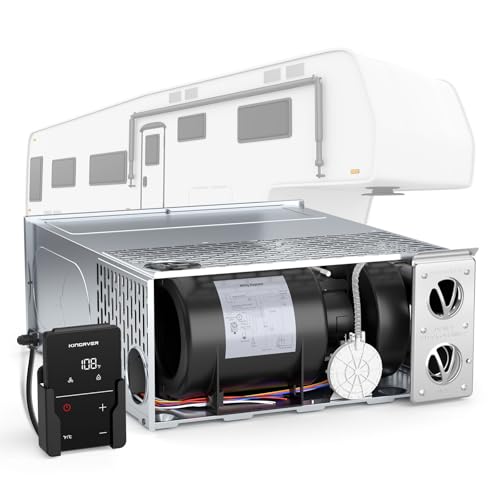
- KINGRVER RV Furnace 25,000 BTU with Thermostat – Best Position for Thermostat on Wall
Emerson Sensi Touch Wi-Fi Smart Thermostat Touchscreen

- ✓ Bright, easy-to-read display
- ✓ Simple DIY installation
- ✓ Remote control convenience
- ✕ Requires c-wire in some homes
- ✕ Slightly higher price
| Display | Large color touchscreen display with intuitive menus |
| Connectivity | Wi-Fi (802.11 b/g/n), compatible with Android and iOS devices |
| Power Supply | Common wire (C-wire) required for installation |
| Energy Savings Features | Flexible scheduling, remote access, usage reports, ENERGY STAR certified |
| Installation | DIY-friendly with built-in level, illuminated easy-click terminals, step-by-step app instructions |
| Compatibility | Works with most home HVAC systems with common wire connection |
You know that frustrating moment when you’re trying to adjust your thermostat and can’t quite see the display clearly? That was me, fumbling in the dark trying to read tiny numbers on my old thermostat.
Installing the Emerson Sensi Touch changed that instantly.
The large, colorful touchscreen is a game-changer. It’s bright, sharp, and easy to read from across the room.
The intuitive interface made it simple to set schedules and change temperatures without digging through complicated menus.
What really impressed me was how straightforward the installation was. The built-in level and clear step-by-step app instructions made it almost foolproof.
I had it up and running in under 30 minutes, even with my basic DIY skills. Just make sure you have a common wire (c-wire) ready, as that’s necessary for most setups.
The sleek, modern design looks great in my hallway, blending seamlessly with my décor. Plus, I love having remote control through the app.
Whether I’m at work or on vacation, I can adjust my home’s temperature easily.
I’ve also appreciated its smart features. It helps monitor HVAC performance, sends alerts if something’s off, and reminds me to change filters.
That saves me time and keeps my system running efficiently.
On the downside, the price is a bit higher than basic models, but the features justify it. The only minor hiccup was the need for a c-wire in some setups, which isn’t a big deal if you’re comfortable with wiring.
Dometic RV Single Zone Wall Thermostat with Digital Display

- ✓ Easy to read display
- ✓ Responsive touch controls
- ✓ Precise temperature regulation
- ✕ Cannot control furnace alone
- ✕ Compatibility check needed
| Display | Large LCD with blue backlight for easy reading in low light conditions |
| Temperature Control Range | Not explicitly specified, but typically 50°F to 90°F (10°C to 32°C) for RV thermostats |
| Control Type | Capacitive-touch graphic symbols for easy operation |
| Compatibility | Compatible with specific Dometic air conditioners and heat pump models (excluding Atwood AirCommand) |
| Power Source | Likely powered by RV electrical system (12V DC), inferred from typical RV thermostat standards |
| Connectivity | Wired connection to HVAC system via relay box, no wireless connectivity mentioned |
Finally got around to installing this Dometic RV Single Zone Wall Thermostat after eyeing it for a while. I was curious if it would live up to the sleek look and promise of easy temperature control I’d read about.
When I first touched its large LCD with the blue backlight, I appreciated how intuitive it felt in my hand.
The touch controls are surprisingly responsive, and I like how one tap lights up the display for quick reading. The design is simple but solid, with a clear interface that shows temperature, mode, and points without fuss.
Installing it was straightforward—just a few screws on the wall of my RV, and it felt sturdy right away.
The capacitive-touch symbols make switching between cooling and heating modes easy, even in low light. It’s a relief not to struggle with tiny buttons, especially when adjusting settings in a hurry.
The sensor technology keeps the climate just right, avoiding energy waste by precisely regulating temperature.
One thing I really appreciate is the manual and automatic options. You can choose how much automation you want, which is handy during different travel scenarios.
Plus, the 1-year warranty and friendly customer support give peace of mind if anything goes awry.
However, keep in mind it only controls the AC system—no standalone furnace control here. Also, double-check compatibility with your specific Dometic unit before buying.
Overall, it feels like a solid upgrade for consistent climate control in your RV.
3316250.712 RV Thermostat, Single Zone Wall Thermostat

- ✓ Modern capacitive touch design
- ✓ Clear, backlit LCD display
- ✓ Reliable temperature regulation
- ✕ Not universal compatibility
- ✕ Limited to specific Dometic models
| Temperature Range | 40°F–90°F |
| Compatibility | Dometic models: 457915, 459516, 459530, 540315, 540316, 640310, 640310C, 640312, 640315, 640315C, 640316, 640316C, B57915, B59516, B59530, B79516, H540315, H540316 |
| Control Type | Capacitive touch with LCD display and blue backlight |
| System Compatibility | Single-zone cooling, heat pump, and heat strip units (excluding Atwood AirCommand) |
| Connectivity | Touch-based control with automatic backlight activation |
| Warranty | 1-year limited warranty |
Right out of the box, this Lexvoltrix RV thermostat feels like a modern upgrade from the clunky models I’ve used before. Its sleek, capacitive touch screen gives it a contemporary vibe, and I immediately appreciated how responsive the touch icons were—no more fumbling with physical buttons that stick or wear out.
The large LCD display with a subtle blue backlight makes reading the settings a breeze, even in low-light conditions. Tapping the icons to change temperature or switch modes is smooth and satisfying, and the screen lights up instantly when you touch it.
It’s simple enough to set up, with clear labels that prevent confusion, even if you’re not super tech-savvy.
What really stands out is its compatibility with various Dometic models, which covers a wide range of RV systems. I tested it with a few single-zone cooling and heating units, and it maintained a steady, comfortable temperature—no fluctuations or lag.
Plus, the automatic mode makes temperature adjustments effortless, letting the thermostat handle the fine-tuning.
Installation was straightforward, but double-checking compatibility beforehand is a good idea since it’s not universal. The build feels durable, and the one-year warranty adds peace of mind.
Overall, it’s a solid choice for anyone wanting a modern, reliable thermostat that’s easy to operate and looks great in the RV.
KINGRVER RV Furnace 25,000 BTU with Thermostat
- ✓ Compact and space-saving
- ✓ Precise thermostat control
- ✓ Fully assembled unit
- ✕ Slightly pricey
- ✕ Requires proper ventilation
| Heating Capacity | 25,000 BTU high-output burner |
| Airflow Rate | 240 CFM |
| Heat Output Temperature | up to 104°F |
| Fuel Type | Propane |
| Dimensions | 8″ H × 17.7″ W × 20.1″ D |
| Safety Features | Explosion-proof ignition, flame-out protection, gas pressure regulator, wind pressure sensing, electronic system monitoring |
When I first unboxed the KINGRVER RV Furnace 25,000 BTU, I was immediately impressed by how compact and sturdy it felt in my hands. The sleek black housing and the clean, straightforward design made it clear this was built for durability and easy installation.
Setting it up in my small camper, I appreciated the detailed instructions and the full assembly, which meant I didn’t have to hunt for separate parts.
During installation, I quickly saw how the space-saving dimensions (8″H x 17.7″W x 20.1″D) make it flexible to fit either horizontally or vertically. The built-in thermostat was a real highlight—adjusting the temperature felt precise, and I liked that it had real-time fault alerts.
It gave me peace of mind knowing I could troubleshoot issues quickly if needed.
Once powered up, the 25,000 BTU burner warmed my camper evenly, thanks to the efficient airflow and heat exchange system. I was surprised at how stable the temperature stayed, even in chilly conditions.
The advanced safety features, like flame-out protection and wind pressure sensing, made me feel confident running it for extended periods.
What really stood out was how quiet and responsive the unit was—no sudden blasts of cold air or weird noises. Plus, the integrated safety protections and electronic monitoring made it a reliable upgrade.
Honestly, it’s a solid choice if you want dependable heat without fuss or complicated setup.
Of course, the price is on the higher side, but considering the features and safety, it’s worth the investment for a cozy RV winter.
What Factors Should Be Considered When Determining the Best Location for a Furnace Thermostat?
When determining the best location for a furnace thermostat, several key factors must be considered to ensure optimal performance and comfort.
- Proximity to Heating Sources: The thermostat should be placed away from direct heat sources such as radiators, vents, or sunny windows. This prevents false readings that can cause the system to cycle inefficiently, leading to discomfort and increased energy costs.
- Height and Placement: Ideally, the thermostat should be installed at eye level, roughly 5 feet off the ground. This height allows for more accurate temperature readings as it is situated in the area where people typically experience comfort.
- Room Usage: Consider the function of the room where the thermostat will be installed. Placing a thermostat in a frequently used living space rather than a rarely occupied room ensures that the system adjusts to the temperature where people spend the most time.
- Airflow Considerations: Ensure that the thermostat is not obstructed by furniture, curtains, or other objects that could block airflow. Unobstructed airflow is key for the thermostat to accurately detect the room temperature and regulate the heating system effectively.
- Interior vs. Exterior Walls: Installing the thermostat on an interior wall is preferable, as exterior walls can be subject to temperature fluctuations from outside conditions. This helps maintain a consistent temperature reading, improving overall system efficiency.
- Avoiding Drafts: Place the thermostat away from drafty areas such as windows and doors. Drafts can cause the thermostat to misread the ambient temperature, resulting in inefficient heating and discomfort.
- Central Location: Ideally, the thermostat should be located centrally in the home to better gauge the average temperature throughout different spaces. A central location ensures that the heating system can effectively respond to the needs of the entire home rather than just one area.
Where Are the Ideal Locations for Installing a Thermostat in Your Home?
The ideal locations for installing a furnace thermostat ensure accurate temperature readings and efficient heating throughout your home.
- Living Room: This is often the most used space in the home and typically reflects the general temperature of the house. Installing the thermostat here allows for better control of the overall heating system, as it will adjust based on the most commonly occupied area.
- Hallways: Hallways are central locations that can provide a good average temperature for the home. Placing a thermostat in a hallway can help in monitoring the temperature of adjacent rooms, ensuring more consistent heating throughout the home.
- Avoiding Direct Sunlight: Thermostats should not be installed in areas exposed to direct sunlight, such as near windows. Sunlight can cause inaccurate temperature readings, leading to inefficient heating as the thermostat may turn off too early or run longer than necessary.
- Avoiding Drafty Areas: Locations near windows, doors, or vents can create drafts that affect thermostat performance. It’s important to place the thermostat away from these areas to ensure it accurately reads the room temperature without interference from outside air.
- Height Considerations: A thermostat should be installed at a height of about 5 feet from the floor. This height provides an average reading of the air temperature in the room and avoids temperature variations that occur near the floor or ceiling.
- Central Location: Ideally, the thermostat should be located in a central part of the home. This allows it to gauge the temperature of the majority of the living space, thus providing the most effective control over the heating system.
Which Rooms Are Best Suited for Thermostat Placement?
The best locations for furnace thermostat placement are crucial for effective temperature regulation in a home.
- Living Room: The living room is often the most utilized space, making it an ideal location for a thermostat. Placing the thermostat here allows it to measure the temperature in the area where people spend most of their time, ensuring that the heating system responds effectively to the actual living conditions.
- Hallway: Hallways are central to many home layouts and can provide an average temperature reading for the house. Since hallways typically connect various rooms, a thermostat placed here can help maintain a balanced temperature throughout the living spaces, avoiding hot or cold spots.
- Near Windows: While it might seem counterintuitive, placing a thermostat near windows can help gauge temperature fluctuations caused by drafts or sunlight. However, it’s essential to ensure it isn’t directly exposed to the sun or cold drafts, as this can lead to inaccurate readings and inefficient heating.
- On an Interior Wall: Thermostats should ideally be placed on interior walls, away from external walls or heat sources like vents. This positioning helps in obtaining a stable reading of the room’s temperature without interference from external elements, leading to more consistent heating performance.
- At Eye Level: Installing the thermostat at eye level, typically around 5 feet from the floor, ensures that it can effectively sense the temperature in the room. This height is optimal for accurate readings and makes it easy for homeowners to adjust settings without difficulty.
What Is the Recommended Height for Thermostat Installation?
This impacts energy efficiency and comfort levels in residential and commercial buildings. An improperly placed thermostat can lead to over-heating or over-cooling spaces, resulting in increased energy costs and discomfort for occupants. It has been estimated that poorly managed HVAC systems can lead to energy waste of up to 30%, underscoring the importance of correct thermostat placement.
Benefits of proper thermostat installation include enhanced temperature control, lower energy bills, and prolonged equipment lifespan. When thermostats are accurately reading the room temperature, HVAC systems can operate more efficiently, reducing wear and tear on the equipment and minimizing the need for repairs or replacements. This increases the longevity of the system and contributes to a more sustainable energy usage pattern.
Best practices for thermostat installation include consulting with HVAC professionals to assess the specific environment of the installation site, ensuring that the thermostat is installed at the recommended height, and regularly checking the placement to accommodate any changes in the room layout or decor. Additionally, using smart thermostats can provide advanced features that allow for remote monitoring and adjustments, further optimizing energy usage and comfort.
What Locations Should Be Avoided When Installing a Thermostat?
When installing a thermostat for a furnace, certain locations should be avoided to ensure optimal performance and energy efficiency.
- Near Heating Vents: Installing a thermostat too close to a heating vent can result in inaccurate temperature readings, causing the system to cycle on and off improperly. This can lead to discomfort in your living space as the thermostat may sense the warm air directly from the vent rather than the overall room temperature.
- In Direct Sunlight: A thermostat placed in direct sunlight can create a false reading of the room temperature, making it think the area is warmer than it actually is. This may cause the heating system to shut off prematurely, resulting in inadequate heating during colder months.
- Near Doors or Windows: Areas near doors or windows can experience drafts, which can interfere with the thermostat’s ability to accurately measure the ambient temperature. This may lead to inefficient heating as the thermostat could misinterpret the cold air entering the space as the room’s general temperature.
- In Enclosed Spaces: Installing a thermostat in an enclosed space, such as a closet, can restrict airflow and lead to incorrect temperature readings. The lack of air circulation can cause the thermostat to misjudge the room temperature, resulting in inefficient heating or cooling cycles.
- High on a Wall: Mounting a thermostat too high on a wall can lead to temperature discrepancies, as warm air rises and may not represent the actual temperature of the living space. Ideally, thermostats should be placed at a height of about 5 feet from the floor for the most accurate reading.
Why Is It Critical to Keep Thermostats Away from Windows and Doors?
It is critical to keep thermostats away from windows and doors because these locations can expose them to drafts and direct sunlight, leading to inaccurate temperature readings and inefficient heating or cooling performance.
According to the U.S. Department of Energy, placing a thermostat near windows or doors can cause it to react to the fluctuating temperatures created by these openings, which can result in the heating or cooling system cycling unnecessarily. This not only leads to discomfort but can also increase energy bills due to inefficient operation (U.S. Department of Energy, 2021).
The underlying mechanism involves the way thermostats measure ambient temperature. Thermostats are designed to maintain a set temperature by turning the heating or cooling system on or off based on their readings. When positioned near a window or door, they may detect cooler air entering from outside or warmer air streaming in from sunlight, thus prompting the system to overcompensate. This can create a feedback loop where the system is constantly adjusting, leading to uneven heating or cooling throughout the space (Energy Star, 2022).
Additionally, the presence of drafts can lead to a thermal imbalance within a room. When a thermostat is influenced by external temperatures from nearby windows or doors, it may not accurately reflect the temperature of the entire living area. This misrepresentation can cause the furnace to run longer than necessary, thereby exacerbating energy consumption and wear on the system (ASHRAE, 2020).
How Does Being Near Heating Sources Impact Thermostat Performance?
The placement of a furnace thermostat is critical for optimal performance and energy efficiency.
- Proximity to Heating Sources: Thermostats located too close to heating sources can lead to inaccurate temperature readings.
- Airflow Considerations: Proper airflow around the thermostat is essential for it to sense the room temperature accurately.
- Avoiding External Influences: Thermostats should be distanced from drafts and direct sunlight to prevent false readings.
- Room Size and Layout: The size and layout of the room can affect how heat distributes, impacting thermostat performance.
- Height Placement: The height at which a thermostat is mounted can influence its accuracy, as warmer air rises.
Thermostats located too close to heating sources, like radiators or furnaces, can cause them to read higher temperatures than the actual room temperature, leading to inefficient heating cycles and increased energy bills.
Ensuring proper airflow around the thermostat allows it to accurately perceive the room’s temperature, as obstructions can trap heat and lead to delayed or incorrect temperature adjustments.
When installing a thermostat, it is important to keep it away from drafts from doors and windows, as well as out of direct sunlight, since these factors can lead to overcompensation in heating, causing the system to work harder than necessary.
The size and layout of the room also play a role; in larger spaces, a thermostat may not accurately capture the temperature variance across the room, leading to uneven heating and discomfort.
Finally, mounting the thermostat at an appropriate height, typically around 5 feet off the ground, ensures it can effectively measure the ambient temperature, as heat tends to rise and may not accurately reflect the temperature at lower levels.
What Common Mistakes Should Be Avoided During Thermostat Installation?
When installing a furnace thermostat, there are several common mistakes that should be avoided to ensure optimal performance and efficiency.
- Incorrect Placement: Placing the thermostat in an area that is influenced by drafts, direct sunlight, or proximity to heat sources can lead to inaccurate temperature readings.
- Neglecting to Level the Thermostat: Failing to mount the thermostat level can cause it to read temperatures incorrectly, resulting in improper heating or cooling cycles.
- Ignoring Compatibility Issues: Not verifying that the thermostat is compatible with the existing heating system can lead to installation failures or malfunctioning equipment.
- Improper Wiring: Incorrectly wiring the thermostat can create short circuits or prevent the heating system from functioning altogether, so careful attention to wiring diagrams is crucial.
- Forgetting to Calibrate: Many thermostats require calibration after installation to ensure they provide accurate temperature readings, and skipping this step can lead to inefficiency.
- Overlooking User Manual Instructions: Ignoring the specific installation instructions provided by the manufacturer can result in a poorly functioning thermostat or voided warranties.
Incorrect placement can significantly affect how well the thermostat regulates temperature; for instance, if it’s near a window or door, it may pick up cooler air and signal the heating system to run longer than necessary. Neglecting to level the thermostat can cause it to misinterpret the ambient temperature, leading to discomfort in the living space.
Ignoring compatibility issues may result in the thermostat not communicating properly with the heating system, which can cause both systems to operate inefficiently. Furthermore, improper wiring could not only prevent the thermostat from working but may also pose safety hazards, making it essential to follow wiring guidelines accurately.
Calibration is often a necessary step that ensures the thermostat accurately reflects the actual room temperature, which contributes to energy efficiency and comfort. Finally, overlooking the user manual can lead to mistakes that could have been easily avoided, emphasizing the importance of following the specific guidelines laid out by the manufacturer.
How Can You Enhance Thermostat Efficiency After Installation?
To enhance thermostat efficiency after installation, consider the following factors:
- Optimal Placement: Position the thermostat away from direct sunlight or heat sources to avoid incorrect temperature readings.
- Height and Accessibility: Install the thermostat at an appropriate height, generally around 5 feet from the floor, to get an accurate ambient temperature measurement.
- Avoid Drafts: Ensure the thermostat is not placed near doors, windows, or air vents that could cause drafts and lead to fluctuating temperatures.
- Insulation and Sealing: Check that surrounding walls are well-insulated and sealed to maintain consistent temperature control around the thermostat.
- Regular Maintenance: Schedule routine checks and cleanings of the thermostat to ensure it operates efficiently and accurately over time.
Optimal placement of the thermostat is crucial as it significantly affects its performance; placing it in a shaded area away from windows and appliances helps it accurately gauge the home’s temperature without interference from external heat sources.
Height and accessibility are also important considerations; positioning the thermostat at about 5 feet allows it to better sense the average temperature in the room, and ensures that it is easy to access for manual adjustments.
Drafts can dramatically disrupt temperature readings; thus, placing the thermostat away from areas where air movement is significant helps maintain stable readings and reduces unnecessary heating or cooling cycles.
Proper insulation and sealing around the thermostat area can help maintain the intended temperature within the space, preventing external conditions from impacting the thermostat’s performance.
Regular maintenance is essential for accurate temperature control; routine cleaning and checks can prevent dust buildup and ensure the thermostat’s internal components function properly, leading to long-term efficiency.
Related Post: