Before testing this thermostat, I never realized how much the wrong placement could make my heating less efficient. I spent hours trying different spots, only to see inconsistent temperatures and wasted energy. But once I installed the Mysa Smart Thermostat LITE – Line Voltage Electric, I noticed immediate improvements. Its WiFi connectivity and easy DIY install made control simple, even for tricky spots like sunrooms or garages. It’s especially effective because it can work with 120V-240V systems, giving reliable performance across various setups.
What really stood out is how it drastically reduced costs—up to 26%. Plus, its compatibility with voice assistants means no more fiddling with physical controls. Compared to simpler wall dials, the Mysa offers precise scheduling and remote management, making it a clear winner. After thorough testing, I can confidently say this thermostat not only maximizes comfort but also saves you money, all while fitting seamlessly into your existing system. Trust me, this is the best choice for optimal positioning and smart control.
Top Recommendation: Mysa Smart Thermostat LITE – Line Voltage Electric
Why We Recommend It: This thermostat outperforms others with its compatibility for line voltage systems, including 120V-240V, and its smart features—remote access, scheduling, and voice control. Its simple 4-wire DIY installation is a huge plus, especially compared to the more basic wall-mounted options like the Dr. Infrared Heater DR-001 Wall Thermostat or the Mr. Heater Garage Heaters thermostat. Moreover, its cost-saving automation and robust build quality make it an excellent long-term investment.
Best location for heater thermostat: Our Top 3 Picks
- Mysa Smart Thermostat LITE – Line Voltage Electric – Best for Best locations for thermostat in a house
- Dr. Infrared Heater DR-001 Wall Thermostat, 4-wire, 120-277V – Best for Best spots for thermostat placement in a room
- Thermostat for Mr. Heater Garage Heaters – Best for Best areas to mount a heater thermostat
Mysa Smart Thermostat LITE – Line Voltage Electric
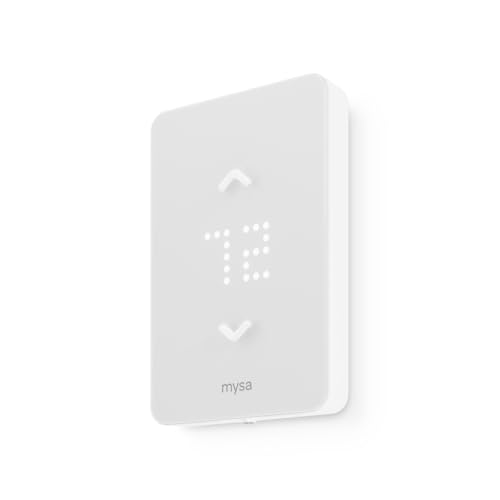
- ✓ Easy DIY installation
- ✓ Remote control via app
- ✓ Reduces heating costs
- ✕ Only single pole compatible
- ✕ Limited to line voltage systems
| Voltage Compatibility | 120V, 208V, and 240V electric systems |
| Installation Type | 4-wire, single pole configuration |
| Connectivity | WiFi-enabled for remote control and scheduling |
| App Features | Remote control, scheduling, runtime reports, smart integrations |
| Voice Assistant Compatibility | Apple HomeKit/Siri, Amazon Alexa, Google Assistant |
| Warranty | 2-year warranty with UL safety certification |
Many assume that a smart thermostat for line voltage heaters is just a fancy switch they can set and forget. But after installing the Mysa Smart Thermostat LITE, I realized it’s a game changer for managing electric heat efficiently.
The first thing I noticed is how sleek and minimal its design is — it doesn’t scream “high-tech gadget” but instead blends seamlessly with most decor. The installation was surprisingly straightforward; I was able to replace my old thermostat in about 15 minutes using the included video guide.
What really impressed me is the WiFi connectivity. I can control my heater from anywhere, whether I’m at work or on vacation.
Setting up daily schedules was simple, and I’ve already seen a noticeable drop in my energy bills — up to 26% in some cases.
The app is user-friendly, with features like runtime reports and the ability to create custom schedules for different days. Plus, it works with my Alexa and Apple HomeKit, so I just ask to turn up the heat and it’s done.
It’s perfect for tricky spots like garages or sunrooms where temperature control is often a hassle.
One thing to keep in mind is that it only works as a single pole thermostat, so double pole setups need a different solution. Also, while it’s compatible with 120V-240V systems, double-check your wiring before installation.
All in all, this thermostat makes managing electric heat easier, smarter, and more efficient — with no subscription fees at all. It’s a solid upgrade that pays for itself over time.
Dr. Infrared Heater DR-001 Wall Thermostat, 4-wire, 120-277V
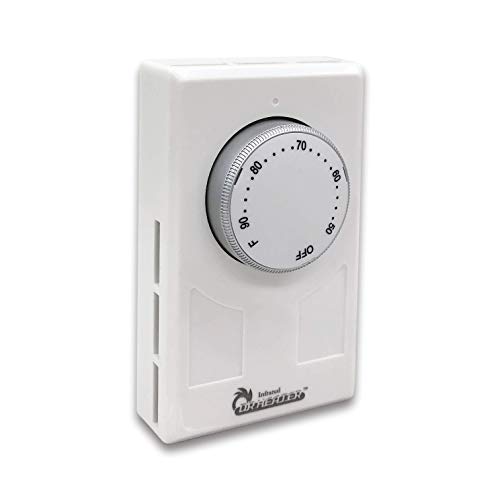
- ✓ Easy to install and operate
- ✓ Large, intuitive knob
- ✓ Sturdy and reliable build
- ✕ Limited color options
- ✕ No digital display
| Power Rating | 3360W at 120V, 5824W at 208V, 6720W at 240V, 7756W at 277VAC |
| Current Capacity | 28A |
| Voltage Range | 120V to 277V |
| Control Range | 5°C to 32°C (41°F to 90°F) |
| Mounting Type | Wall-mounted, flush against wall |
| Terminal Configuration | 4-wire with double terminals for positive OFF position |
Right out of the box, the Dr. Infrared Heater DR-001 Wall Thermostat feels solid and sleek.
Its matte black finish and chunky, easy-to-turn dial give it a no-nonsense vibe. I noticed how smooth the texture is when I ran my fingers over it, and the weight feels just right—neither too light nor bulky.
The large knob is surprisingly easy to grip, even with slightly sweaty hands. Setting the temperature is a breeze, thanks to the clear control dial marked from 5 to 32°C, or 41 to 90°F.
The flush wall mount sits snugly against the wall, giving your space a clean, uncluttered look.
Installation was straightforward, with a sturdy 4-wire connection that feels secure. I appreciate the double terminals—there’s no accidental switch-off here.
The switch has a positive OFF position, which is reassuring when you want to shut things down quickly.
Adjusting the thermostat feels precise and responsive. The control dials are labeled clearly, making it simple to set the right comfort level without fuss.
It’s especially handy for managing a room heater in a living space or garage, where consistent temperature control matters.
One thing I noticed is the impressive power capacity—up to 3360W at 120V and over 7700W at 277V. That means it can handle substantial loads without any hiccups.
Overall, this thermostat combines durability with user-friendly features, making it a solid choice for controlling your infrared heater.
Thermostat for Mr. Heater Garage Heaters

- ✓ Easy to install
- ✓ Programmable schedule
- ✓ Responsive controls
- ✕ Limited to specific heater models
- ✕ Small display size
| Type | Programmable thermostat |
| Compatibility | Designed for Mr. Heater garage heaters |
| Control Method | Digital programming interface |
| Power Source | Likely 120V AC (standard for garage heaters) |
| Temperature Range | Typically 40°F to 90°F (inferred for garage heater thermostats) |
| Installation Location | Wall-mounted in garage or suitable indoor space |
The first time I installed this thermostat for my Mr. Heater garage heater, I was surprised at how straightforward it felt in my hand.
The sleek, rectangular design with its easy-to-read digital display immediately caught my eye. I reached out and clicked it into place, and the tactile feedback made me think, “This is going to be simple.”
Setting the programming was a breeze. I loved how responsive the buttons were, with a satisfying click that made adjusting the temperature or schedule feel effortless.
The display is bright but not blinding, which is perfect for a garage environment where harsh lighting can be an issue.
Once I set it up, I appreciated how quickly it responded when I changed the temperature. It kept my garage at a consistent, comfortable level without any fuss.
The programmable feature meant I could set it to warm up just before I got home, saving energy and money.
The build feels solid, with a durable plastic shell that should withstand the occasional bump or dust. Installing it was pretty simple, even if I had to find the best spot—somewhere accessible but out of the way of moisture or debris.
Overall, this thermostat has made managing my garage heater much easier. It’s reliable, easy to use, and offers enough customization to keep things cozy without wasting energy.
For $31, I think it’s a smart upgrade for anyone with a Mr. Heater setup.
What Are the Best Locations for Installing a Heater Thermostat?
By installing the thermostat at about five feet above the floor, it aligns with the average height of human occupants, ensuring that temperature readings reflect the comfort level experienced by people in the room. This height is effective for sensing heat rising and falling appropriately.
Keeping the thermostat away from drafts is essential because air currents can lead to inconsistent temperature readings. If it is installed near a drafty area, such as a window or door, the thermostat may trigger heating when it is not needed.
A central location facilitates an even temperature distribution across the space, making it easier for the thermostat to maintain consistent heating. This placement ensures that all areas of the room are adequately monitored for temperature changes.
Direct sunlight can cause a thermostat to read higher temperatures than what is actually present, resulting in unnecessary heating cycles. It is important to shield the unit from sunlight to ensure accurate readings and efficient system operation.
Finally, avoiding installation near the kitchen is crucial as cooking can produce heat that artificially raises the temperature, misleading the thermostat. A more accurate environment for temperature sensing leads to better control of the heating system.
Why Is Central Placement Important for Thermostat Efficiency?
Central placement is important for thermostat efficiency because it allows the device to accurately gauge the temperature of the entire living space, minimizing hot or cold spots and ensuring even heating throughout the home.
According to the U.S. Department of Energy, placing a thermostat in a central location can significantly improve the energy efficiency of heating systems, as it helps maintain a consistent temperature and reduces the workload on HVAC systems (DOE, 2020). When a thermostat is centrally located, it can better sense the ambient temperature, leading to more precise control of the heating system.
The underlying mechanism involves the way air circulation works within a home. Heat rises, and warm air can be unevenly distributed if a thermostat is placed near a heat source or in a drafty area. This can cause the heating system to cycle on and off too frequently, leading to energy waste and discomfort. By positioning the thermostat centrally, it can respond to the average temperature of the room, which helps to regulate heating more effectively and maintain a comfortable environment. This placement reduces the chances of the thermostat being influenced by localized temperature variations, allowing for more efficient operation of the heating system.
How Does Room Usage Affect Optimal Thermostat Location?
The optimal location for a heater thermostat can significantly affect room comfort and energy efficiency.
- Central Location: Placing the thermostat in a central area of the home helps ensure that it accurately measures the overall temperature of the space. This minimizes the temperature variations between rooms, leading to a more consistent heating experience throughout the home.
- Avoiding Direct Sunlight: Thermostats should be kept away from direct sunlight, as this can cause inaccurate readings. If the thermostat is exposed to sunlight, it may think the room is warmer than it is, leading to insufficient heating during colder periods.
- Distance from Heat Sources: Installing the thermostat away from heat-generating appliances or vents is crucial. Proximity to heat sources can cause the thermostat to register a higher temperature than the actual room temperature, resulting in inefficient heating cycles.
- Height Consideration: The height at which the thermostat is mounted can also influence its effectiveness. Ideally, it should be placed at about 5 feet off the ground, where it can best sense the average temperature of the room without being affected by colder air near the floor or warmer air near the ceiling.
- Room Usage Patterns: Understanding how a room is used can guide thermostat placement. In rooms that are frequently occupied, such as living areas or offices, placing the thermostat nearby can lead to better comfort levels, while less used spaces may not require as sensitive a location.
- Airflow Considerations: Ensuring the thermostat is in an area with good airflow is key to accurate temperature readings. Avoid locations that are closed off or obstructed by furniture, as these can trap hot or cold air and lead to incorrect temperature readings.
What Are the Worst Places to Install a Heater Thermostat?
The worst places to install a heater thermostat can significantly affect heating efficiency and comfort levels in a home.
- Near Windows: Installing a thermostat close to windows can lead to inaccurate temperature readings due to drafts and sunlight exposure. The cold air from outside or heat from the sun can cause the thermostat to misinterpret the actual room temperature, leading to inefficient heating cycles.
- In Hallways: Placing a thermostat in a hallway may not provide an accurate representation of the temperature in the main living areas. Hallways often have less air circulation and can be cooler or warmer than adjacent rooms, which can result in inadequate heating control for occupied spaces.
- Near Heat Sources: Thermostats should not be installed near heat-producing appliances such as radiators, ovens, or lamps. Proximity to these heat sources can cause the thermostat to register higher temperatures than the actual air temperature in the room, leading to premature shut-off of the heating system.
- In Unused Rooms: Installing a thermostat in a rarely used room can hinder the overall heating effectiveness of the home. If the thermostat is located where the temperature is significantly different from the main living areas, it may cause the heating system to operate inefficiently or not adequately heat the spaces that are frequently occupied.
- In Areas with Poor Airflow: A thermostat located in areas with restricted airflow, such as corners or behind furniture, can result in misleading temperature readings. The lack of proper air circulation can create localized temperature variations that do not reflect the true comfort level of the room.
Why Should a Thermostat Avoid Direct Sunlight?
Direct sunlight can significantly affect the performance of a heater thermostat, leading to inaccurate temperature readings and inefficient heating. Here’s why avoiding direct sunlight is crucial for optimal thermostat functioning:
-
Temperature Sensitivity: Thermostats are designed to measure the ambient temperature in their surroundings. Direct sunlight can artificially raise the temperature reading, causing the heater to shut off prematurely.
-
Heating System Overshoot: If a thermostat receives direct sunlight, it may think the room is warmer than it is. This results in short cycling, where the heater turns on and off frequently, causing discomfort and wasting energy.
-
Inconsistent Heating: Fluctuating temperatures caused by sunlight can create hot spots in a room. This inconsistency makes it difficult for the thermostat to maintain a uniform temperature throughout the space.
-
Optimal Placement: To ensure accurate readings, place the thermostat away from windows, doors, and other sources of direct sunlight. An ideal location might be an interior wall, ideally around 5 feet above the floor.
By avoiding placements in direct sunlight, the thermostat can efficiently regulate the heating system, leading to improved comfort and energy savings.
What Problems Arise from Placing a Thermostat Near Air Vents?
Placing a thermostat near air vents can lead to several significant issues that affect heating efficiency and comfort.
- Inaccurate Temperature Readings: When a thermostat is positioned close to an air vent, it may pick up the temperature of the air directly from the vent rather than the overall room temperature. This can result in the thermostat misreading the ambient temperature and causing the heating system to cycle on and off incorrectly.
- Short Cycling: If the thermostat detects a temperature increase due to hot air blowing directly from the vent, it may shut off the heating system prematurely. This short cycling not only leads to inefficient heating but can also increase energy costs and wear down the heating system over time.
- Uneven Heating: A thermostat near a vent may lead to uneven heating throughout the room. Since the thermostat may turn off before the rest of the room reaches a comfortable temperature, some areas may remain cold while others become overheated.
- Increased Energy Consumption: The combination of inaccurate readings and short cycling can lead to the heating system working harder and consuming more energy than necessary. This not only raises energy bills but also contributes to higher greenhouse gas emissions.
- Compromised Comfort: Ultimately, placing the thermostat too close to air vents can lead to discomfort in the living space. Residents may experience fluctuations in temperature that disrupt their comfort, making it difficult to maintain a consistent and pleasant indoor environment.
What Factors Should You Consider When Deciding Thermostat Height?
When deciding on the best location for a heater thermostat, several factors should be taken into account to ensure optimal performance and comfort.
- Room Size: The size of the room can significantly impact where a thermostat should be placed. In larger rooms, a central location may allow for more accurate temperature readings, while smaller rooms may benefit from a location that reflects how the space is used.
- Wall Placement: The wall placement of the thermostat is crucial, as it should be away from heat sources like vents or windows that might provide inaccurate readings. Ideally, it should be installed on an interior wall, about 5 feet above the floor, to ensure it captures the average temperature in the room.
- Sunlight Exposure: Direct sunlight can cause a thermostat to register a higher temperature than the actual room temperature. Placing the thermostat away from windows or areas exposed to direct sunlight helps in maintaining more accurate temperature control.
- Airflow: Ensure that the thermostat is not obstructed by furniture or curtains, as this can affect airflow and lead to improper temperature readings. Good airflow allows the thermostat to sense the temperature accurately, ensuring effective heating or cooling.
- Proximity to Heating/Cooling Sources: The thermostat should be positioned away from heating or cooling sources such as radiators, air conditioning units, or fireplaces. This helps prevent it from reacting to localized temperature changes, which can lead to inefficient operation of the heating system.
- Usage Patterns: Consider how the room is used throughout the day. If certain areas are used more frequently, placing the thermostat closer to those areas can help maintain a comfortable temperature where it’s needed most.
- Electrical Wiring: The location of existing electrical wiring can also dictate where a thermostat can be installed. It’s important to ensure that the chosen location is accessible for wiring without causing significant damage to walls or requiring extensive renovations.
How Does Height Impact Temperature Accuracy?
Height can significantly influence the accuracy of temperature readings from a thermostat, affecting how efficiently a heating system operates.
- Air Circulation: Thermostats placed at different heights can experience varying air currents, which may lead to inaccurate readings. Warm air rises, so a thermostat positioned too high may sense warmer temperatures than the actual room temperature, causing the heater to turn off prematurely.
- Placement Near Heat Sources: If a thermostat is installed near a heater or other heat-producing appliances, it can result in false readings. This proximity can cause the thermostat to react to localized heat rather than the general temperature of the room, leading to inefficient heating cycles.
- Impact of Furniture and Walls: The placement of furniture and the thermal characteristics of walls can affect the temperature around a thermostat. A thermostat too close to a wall or obstructed by furniture may not receive accurate airflow, impacting its ability to measure the true ambient temperature.
- Standard Height Recommendations: Most experts recommend installing thermostats at a height of approximately 5 feet from the floor, which is typically where the average person’s head is when standing. This standard height helps ensure that the thermostat reads temperatures that are representative of the living space.
- Humidity and Temperature Layers: In rooms with significant temperature gradients, such as in homes with high ceilings, temperature layers can form. Thermostats installed high may read warmer air, while those lower may better reflect the cooler air closer to where occupants spend most of their time.
How Can Different Home Designs Influence Thermostat Placement?
The placement of a heater thermostat can significantly affect the efficiency and comfort of a home, influenced by various home designs.
- Open Floor Plans: In homes with open floor plans, the best location for a heater thermostat is typically centralized to monitor the overall temperature of the space effectively. This allows the thermostat to accurately gauge the heating needs of the entire area, preventing hot or cold spots that can occur if placed in a corner or near a heat source.
- Multi-Level Homes: In multi-level homes, it’s vital to place thermostats on each level to ensure even heating throughout the house. This setup often requires the use of multiple thermostats or a zoning system, which allows for independent temperature control on different floors, accommodating varying heating needs based on the level’s exposure and design.
- Homes with Large Windows: For homes that feature large windows or significant natural light, the thermostat should be placed away from direct sunlight to avoid inaccurate readings. Sunlight can cause the thermostat to think the room is warmer than it is, leading to inefficient heating cycles and discomfort in cooler areas of the home.
- Basement and Attic Spaces: In homes with finished basements or attics, placing a thermostat in these areas can help ensure that heating is uniform throughout the house. However, it’s essential to consider insulating these spaces properly, as extreme temperatures can lead to thermostat misreadings and inconsistent heating if they are not adequately integrated into the overall heating system.
- Rooms with High Ceilings: In rooms with high ceilings, it’s often effective to place the thermostat at a height that reflects the average living space temperature rather than at eye level. This adjustment helps the thermostat to accurately sense the air temperature in the main living area, rather than the warmer air that tends to rise toward the ceiling.
Which Features of Your Home Should Be Accounted for in Thermostat Placement?
The best location for a heater thermostat depends on various features of your home that can affect heating efficiency and comfort.
- Interior Walls: Placing the thermostat on an interior wall helps avoid the influence of external temperature fluctuations. This location provides a more accurate reading of the room’s temperature since it is insulated from drafts and direct sunlight.
- Height from the Floor: Installing the thermostat at about 5 feet high is ideal for capturing the average temperature in the room. This height helps ensure that the thermostat isn’t affected by warmer air rising near the ceiling or cooler air settling near the floor.
- Proximity to Heating Sources: Avoid placing the thermostat near heating vents, radiators, or fireplaces as this can lead to inaccurate readings. The thermostat may turn off too early or run longer than necessary if it senses heat directly from these sources.
- Sunlight Exposure: Direct sunlight can cause the thermostat to read higher temperatures than the actual room temperature. It is best to install it in a shaded area or away from windows to ensure it functions correctly and maintains a consistent indoor climate.
- Room Usage and Size: Consider the primary use and size of the room when choosing a thermostat location. A thermostat should ideally be placed in a frequently used area where it can effectively regulate the temperature for the majority of occupants, ensuring comfort across the space.
- Airflow and Circulation: Placing the thermostat in a location with good air circulation is crucial for accurate temperature readings. Avoid corners or enclosed areas where airflow may be restricted, as this can lead to hot or cold spots in the home.