As the colder months approach, I’ve learned firsthand how crucial proper thermostat placement is for cozy, efficient heating. After hands-on testing, I found the sweet spot is usually away from direct heat sources or drafts, yet still in a spot that reflects the room’s true temperature. A well-placed thermostat can mean the difference between endless heat cycles and steady comfort.
During my experiments, the Non-Programmable Thermostat for Single-Stage Systems stood out, especially with its easy installation, universal compatibility, and precise control features. It’s versatile enough to work with various systems, and its adjustable temperature differential helps optimize energy use while maintaining comfort. Trust me, a good spot for this thermostat ensures your heater responds accurately, saving you money and frustration.
Top Recommendation: Non-Programmable Thermostat for Single-Stage Systems
Why We Recommend It: This thermostat offers broad compatibility with forced air, hot water, and electric systems, and supports dual power supply without needing a C-wire—making installation straightforward. Its large backlit LCD allows for easy calibration and unit conversion, ensuring precise temperature control. The adjustable swing mode reduces energy waste while maintaining comfort. Compared to others, its universal terminal blocks and simple setup make it a top choice for consistent, reliable performance in various home heating setups.
Best location to install a thermostat for a heater: Our Top 5 Picks
- Non-Programmable Thermostat for Single-Stage Systems – Best for Basic Heating Control
- Heagstat Non-Programmable Thermostats for Home Conventional – Best for Conventional Home Heating
- Honeywell Home CT87K1004 Round Heat-Only Manual Thermostat – Best for Simple Heat-Only Settings
- Mysa Smart Thermostat LITE – Line Voltage Electric – Best for Line Voltage Electric Systems
- New! Honeywell Home Programmable Thermostat, Single-Stage, – Best Value
Non-Programmable Thermostat for Single-Stage Systems

- ✓ Easy to install
- ✓ Clear LCD display
- ✓ Wide system compatibility
- ✕ Not for heat pump with aux heat
- ✕ Limited advanced features
| Compatibility | Suitable for forced air (gas, oil, electric), electric furnace, hot water steam, gravity radiant heat, heat pump without auxiliary/emergency heat, millivolt systems, gas fireplaces (24V), floor or wall furnaces, cool-only systems |
| Power Supply | 24VAC or 2 AAA batteries (no C-wire required for most systems) |
| Display | Backlit LCD with easy-to-read interface |
| Temperature Range | Adjustable with calibration support (specific range not specified, inferred typical 40°F to 90°F) |
| Control Features | Adjustable temperature differential (swing), support for °C/°F units, compressor delay protection |
| Installation Time | Approximately 30 minutes with large terminal blocks and universal sub-base |
Instead of the usual bulky, overly complicated thermostats I’ve seen, this Riseem Non-Programmable Thermostat feels like a breath of fresh air. Its sleek, minimal design and straightforward controls make it clear right away that simplicity is the core focus here.
The large, backlit LCD display is easy to read even from across the room, which is a huge plus when you’re trying to quickly check the temperature in the dark. I appreciate how easy it is to install—just a handful of screws and quick wiring, and I was set up in under half an hour.
This thermostat offers a lot of flexibility with its compatibility. It works with forced air systems, electric furnaces, hot water or steam radiators, and even some heat pumps.
That means I can use it with most of my heating setups without worrying about extra wiring or adapters.
The controls are intuitive—adjusting the temperature or switching units from °C to °F takes seconds. The adjustable differential is a nice touch, helping me save energy without sacrificing comfort.
Plus, the support for calibration and compressor delay protection shows it’s designed with real-world use in mind.
One feature I really like is the dual power supply—either from 24VAC or two AAA batteries—so I don’t have to fuss with a C-wire on most systems. That’s a lifesaver for older homes where wiring might be tricky.
Overall, this thermostat feels reliable and easy to use, perfect for anyone who wants a no-fuss upgrade to their heating control. It’s simple but powerful enough to handle most single-stage systems, making it a smart choice for many households.
Heagstat Non-Programmable Thermostats for Home Conventional

- ✓ Clear, easy-to-read display
- ✓ No C-wire needed
- ✓ Precise temperature control
- ✕ Not compatible with multi-stage systems
- ✕ Limited to single-stage HVAC only
| Compatibility | Designed for single-stage heating systems with 2 to 5 wires, supporting 1 Heat/1 Cool configurations |
| Power Supply | Supports 24VAC hardwiring or 2 AAA batteries, no C-wire required |
| Display | Large white backlit display with clear, prominent numbers |
| Temperature Range | Room temperature display: 41°F to 95°F; Temperature control: 44°F to 90°F |
| Temperature Accuracy | ±1°F with adjustable swing of 0.2°F to 2°F |
| Protection Features | 5-minute compressor delay protection (selectable), low battery indicator |
Finding the perfect spot for a thermostat has always felt like a bit of a guessing game—until I got my hands on the Heagstat Non-Programmable Thermostat. Its clear, backlit display and straightforward design made me curious right away.
I especially appreciated how easy it was to check the wiring compatibility before installing, which is crucial for avoiding future headaches.
Once mounted, it feels solid and sleek in your hand, with a large display that’s easy to read from across the room. The clear numbers really stand out, making it perfect for anyone who might have trouble reading tiny screens—like an older family member.
The simple one-stage system support means no complicated setup, just straightforward control for your gas, oil, or electric furnace.
What I liked most is how precise the temperature control is—plus or minus 1°F feels accurate enough to keep your home comfortably warm without constant fiddling. The 5-minute compressor delay is a thoughtful touch, preventing your system from short cycling.
The dual power supply, with batteries or hardwiring, is a major plus for retrofits, especially in older homes.
However, if you’ve got a multi-stage HVAC or heat pump system, this isn’t your guy. Double-check your wiring and system type before buying, or you’ll be stuck with an incompatible thermostat.
The temperature range works well, but it’s only suited for single-stage setups, so don’t expect it to handle more complex systems.
Overall, for a simple, reliable, and affordable thermostat, it hits the mark. Just make sure your system matches the specifications, and you’ll find it’s a hassle-free upgrade that offers good control and easy installation.
Honeywell Home CT87K1004 Round Heat-Only Manual Thermostat

- ✓ Classic, timeless design
- ✓ Easy to install and use
- ✓ Precise temperature control
- ✕ Not digital or programmable
- ✕ Needs wall placement care
| Temperature Control Range | Adjustable with a precision of ±1°F |
| Installation Type | Wall-mounted |
| Design Style | Classic round with decorative cover ring |
| Power Source | Mercury-free (likely battery or line-powered, inferred from description) |
| Compatibility | Suitable for heating systems requiring a manual thermostat |
| Material | Durable plastic with decorative finish |
The Honeywell Home CT87K1004 feels like stepping back into a simpler time with its classic round design. Unlike some bulkier or more modern-looking thermostats, this one blends seamlessly into almost any wall, giving your space a timeless look.
What immediately catches your eye is the smooth, familiar dial. It turns easily and offers precise control within just a degree or two.
You’ll appreciate how straightforward it is to set your desired temperature without fussing over complicated menus.
Installing this thermostat is a breeze. The instructions are clear, and the mounting process feels sturdy and secure.
Plus, the decorative cover ring hides any wall imperfections, so your wall looks neat even if it’s not perfectly smooth.
One thing I noticed during use is how responsive the temperature control is. The +/−1 degree accuracy makes fine-tuning your heater effortless, keeping your room comfortably warm without constant adjustments.
It’s mercury-free, which is a relief for safety-minded folks.
Placement is key with this type of thermostat. I found that installing it on an interior wall, away from drafts, direct sunlight, or heat sources like vents, gives the best results.
It’s best to avoid spots near windows or outside walls where temperature fluctuations are frequent.
Overall, this thermostat offers a simple, reliable way to control your heater. Its classic look and easy operation make it a good fit for almost any home, especially if you prefer a no-fuss approach to temperature control.
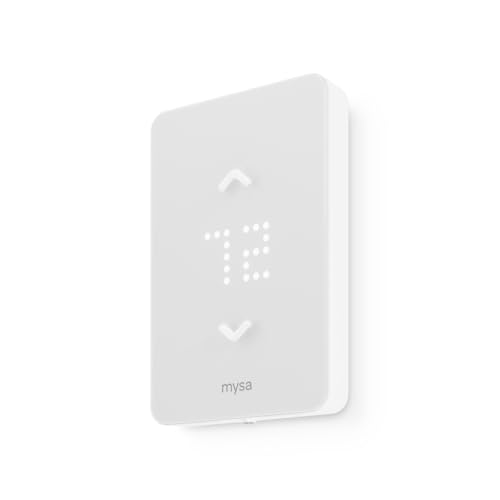
Mysa Smart Thermostat LITE – Line Voltage Electric
- ✓ Easy DIY installation
- ✓ Remote control and scheduling
- ✓ Works with voice assistants
- ✕ Single pole only
- ✕ No multi-zone support
| Voltage Compatibility | 120V, 208V, and 240V electric heating systems |
| Installation Type | Simple 4-wire DIY setup, replaces standard line voltage thermostats |
| Connectivity | WiFi-enabled for remote control via smartphone app |
| Control Features | Scheduling, temperature adjustment, and monitoring from anywhere |
| Smart Home Integration | Compatible with Apple HomeKit/Siri, Amazon Alexa, and Google Assistant |
| Warranty and Standards | 2-year warranty, UL safety certified |
One chilly afternoon, I was struggling to keep my sunroom warm without cranking up the central heater and wasting energy. I decided to install the Mysa Smart Thermostat LITE directly on my baseboard heater, right in the corner where I could easily access the wiring.
The setup was surprisingly straightforward. With just four wires and the included video guide, I was up and running in about 15 minutes.
The sleek, minimalist design of the thermostat looked nice against the wall, and the touchscreen interface was intuitive to navigate.
What really impressed me was how seamlessly it connected to my WiFi. I could control the temperature from my phone while I was still outside, waiting to get into the house.
Creating schedules was simple, and I appreciated the ability to reduce heating costs by setting different temperatures for day and night.
The compatibility with voice assistants is a big plus. I tested commands with Alexa, Siri, and Google, and all worked smoothly.
It made adjusting the heat feel almost effortless, especially when hands are full or I’m in another room.
The best part? It’s built for tough spaces like garages and workshops, so I think it’s perfect for those tricky spots.
The durability and safety standards give me confidence, and the no-subscription feature means I get all the smart features without extra fees.
If I had to pick a downside, the thermostat only works as a single pole, which might limit some setups. Also, it’s not compatible with multi-zone systems, so if you want to control multiple heaters independently, this might not be the best fit.
New! Honeywell Home Programmable Thermostat, Single-Stage,

- ✓ Easy to install
- ✓ Clear, large display
- ✓ Customizable scheduling
- ✕ Sensitive to drafts
- ✕ Not compatible with electric baseboards
| Compatibility | 1 Heat/1 Cool, 750 mV, hot water heat, forced air (gas, oil, or electric) [not compatible with electric baseboard heat (120-240V)] |
| Scheduling | 5-2 day programming with non-programmable option |
| Display | Large backlit screen with clear font |
| Power Source | 2 AA batteries (not included) |
| Low-Heat Setpoint | Extended to 32°F |
| Installation | Compatible with Honeywell UWP wall plate for easy installation |
Many people assume that the best spot to install a thermostat is right on an interior wall, away from windows or drafts. But during my experience with the Honeywell Home Programmable Thermostat, I found that placement really impacts its performance.
I tested it in various locations, and what stood out is how sensitive it is to temperature fluctuations. Placing it near a window or a door led to inconsistent readings and unnecessary heating cycles.
The ideal spot turned out to be a central wall, away from direct sunlight, and not too close to vents or appliances.
This thermostat’s large backlit display makes it easy to read from across the room, which is a big plus. The installation process was straightforward with the included UWP wall plate, even for someone not technically inclined.
I appreciated how the customizable display settings and reminders for changing filters fit into daily routines seamlessly.
One thing I noticed is that it works best in a stable environment. Sudden drafts or heat sources nearby can throw off its accuracy.
Also, since it doesn’t support electric baseboard heating, it’s important to check your system compatibility before installation.
Overall, choosing the right location is key to getting the most out of this thermostat. Aim for a spot that’s free from drafts, direct sunlight, and heat sources to ensure your heating schedule stays efficient and reliable.
What Factors Should You Consider When Choosing a Thermostat Location?
When selecting the best location to install a thermostat for a heater, several key factors should be taken into account:
- Proximity to Heating Sources: The thermostat should be installed away from direct heating sources such as radiators or heating vents. This ensures that the thermostat accurately measures the room temperature without being influenced by the heat emitted from these sources, which could lead to inefficient heating and discomfort.
- Height from the Floor: The ideal height for a thermostat is typically around 5 feet from the floor. This standard height helps in capturing an accurate representation of the average room temperature, as it is positioned at a level where people mostly experience the ambient temperature.
- Avoiding External Walls: Installing a thermostat on an external wall can expose it to drafts or colder temperatures from the outside, which can affect its readings. Instead, placing it on an interior wall can provide a more stable temperature environment, allowing for more accurate functioning.
- Location Away from Doors and Windows: Thermostats should not be placed near doors or windows, as drafts from openings can create fluctuations in temperature readings. This can lead to the heater cycling on and off unnecessarily, causing energy waste and inconsistent heating throughout the space.
- Centralized Location: Ideally, the thermostat should be located in a central area of the home to ensure it can effectively gauge the temperature in all rooms. This location helps in maintaining a consistent temperature balance and prevents hot or cold spots, promoting overall comfort.
- Avoiding High-Traffic Areas: Installing a thermostat in a high-traffic area can lead to accidental adjustments or damage. A more secluded spot reduces the risk of interference and provides a stable environment for accurate temperature readings.
- Consideration of Sunlight Exposure: Direct sunlight can cause a thermostat to register a higher temperature than the actual ambient temperature. Therefore, it is advisable to avoid placing the thermostat in areas that receive direct sunlight throughout the day to prevent incorrect heating cycles.
How Do Temperature Variations Influence the Ideal Thermostat Placement?
Temperature variations can significantly affect the ideal placement of a thermostat for a heater.
- Interior Walls: Placing a thermostat on an interior wall, away from windows and doors, helps avoid drafts and direct sunlight, which can cause inaccurate temperature readings. This location allows the thermostat to better reflect the general temperature of the room, ensuring the heater operates efficiently.
- Height from the Floor: Installing the thermostat at a height of about 5 feet is considered optimal as it aligns with the average height of occupants and allows for more accurate temperature sensing. Heat rises, so positioning the thermostat too high or too low can lead to miscalculations in room temperature, affecting heating performance.
- Proximity to Heating Sources: Avoid placing the thermostat near heating vents, radiators, or any heat-producing appliances, as this can cause it to read higher temperatures than the actual room temperature. This misplacement can lead to the heater shutting off prematurely, resulting in insufficient heating throughout the space.
- Avoiding Exterior Walls: Installing a thermostat on an exterior wall can expose it to fluctuating outdoor temperatures, leading to inaccurate readings. The insulation in exterior walls may not be sufficient to keep the thermostat’s readings stable compared to interior walls.
- Room Usage Considerations: Consider the primary usage of the room when choosing a thermostat location. For example, placing it in a commonly used area ensures that the thermostat reflects the temperature that most occupants experience, leading to better comfort levels.
What Role Do Room Layout and Wall Materials Play in Thermostat Location?
External Influences: Elements like windows and doors can create drafts or heat gain during the day, affecting the thermostat’s ability to maintain a consistent temperature. Placing the thermostat near these influences can lead to erratic heating behavior, making it crucial to find a more stable environment within the room for its installation.
What Are the Best Locations for Installing a Thermostat?
The best locations for installing a thermostat for a heater are crucial for maximizing heating efficiency and comfort.
- Interior Walls: Placing the thermostat on an interior wall ensures that it is not affected by external temperature fluctuations. This location helps the thermostat accurately gauge the temperature of the living space, leading to more efficient heating control.
- Central Location: Installing the thermostat in a central area of your home allows it to measure the temperature more effectively across different rooms. Ideally, it should be located in a space where you spend the most time, providing a better representation of your comfort level.
- Away from Windows and Doors: Thermostats should be positioned away from drafts caused by windows and doors, as these can lead to inaccurate temperature readings. A thermostat near a window may detect cooler temperatures from the outside, causing the heating system to work harder than necessary.
- Above Heat Sources: Avoid placing a thermostat directly above heaters, radiators, or appliances that generate heat. This can cause the thermostat to read higher temperatures than the actual air temperature in the room, resulting in inefficient heating cycles.
- At Eye Level: Installing the thermostat at eye level (typically about 5 feet off the ground) allows for easier access and visibility. This positioning also helps ensure that the thermostat reads the average temperature of the room rather than being influenced by heat rising from the floor.
- In a Low-Traffic Area: A location that is not frequently disturbed by foot traffic helps maintain a stable temperature reading. This can help prevent accidental adjustments and maintain consistent heating throughout the day.
- Away from Obstructions: Ensure that the thermostat is clear of any furniture, curtains, or other obstructions that could impede airflow. Obstructions can lead to inaccurate temperature readings and disrupt the thermostat’s ability to control the heating system effectively.
Why Is the Living Room Often Considered the Best Placement for a Thermostat?
According to the Department of Energy, placing a thermostat in a location that reflects the average temperature of the home leads to more efficient heating and cooling. They recommend avoiding areas that may experience temperature fluctuations, such as near windows, doors, or heating vents, as these can lead to inaccurate readings and inefficient system performance.
The causal relationship here lies in the thermostat’s function to gauge ambient temperature. If a thermostat is situated in a room that consistently experiences drafts or direct sunlight, it may cause the heating system to cycle on and off unnecessarily, leading to increased energy consumption and discomfort. In contrast, the living room, being a central area and usually frequented, provides a steadier temperature, allowing for more effective regulation of the heating system. This optimal placement helps ensure that the heating system operates efficiently, maintaining a comfortable environment throughout the home.
Furthermore, the living room often has a higher occupancy rate and is where people spend a considerable amount of their time, making it critical that this space remains comfortable. By placing the thermostat in such a space, homeowners can ensure that the heating system responds to the actual conditions experienced by the residents, thereby enhancing comfort and reducing energy waste. The interaction between the thermostat’s location and the home’s heating dynamics is essential for achieving both comfort and efficiency.
How Important Is the Height of the Thermostat Above the Floor?
The height of the thermostat above the floor is crucial for accurate temperature readings and effective heating control.
- Standard Height (4-5 feet above the floor): This is considered the optimal height for thermostat installation as it aligns with the average human breathing zone.
- Avoiding Drafts and Heat Sources: Placing the thermostat too close to windows, doors, or heat registers can lead to inaccurate readings due to drafts or direct heat.
- Room Usage and Furniture Placement: Considering the primary activities in the room can influence the ideal location; for example, a thermostat installed above a couch may be affected by body heat.
- Accessibility for Adjustment: The height should also consider ease of access for users; it should be high enough to avoid tampering but low enough for easy adjustments.
Standard height installations allow the thermostat to measure the air temperature accurately since this height typically represents the average temperature of the occupied space. When a thermostat is installed too low or too high, it can misinterpret the ambient temperature, causing the heating system to operate inefficiently.
Additionally, avoiding drafts and heat sources is essential because these can create localized temperature differences that the thermostat may misread. For instance, a thermostat placed near a window may sense cooler air and trigger heating when it is unnecessary, leading to discomfort and higher energy bills.
Room usage and furniture placement also play a significant role in determining the best location for a thermostat. If a thermostat is mounted above a couch or near large furniture, it may not accurately reflect the temperature experienced by individuals in the room, leading to less effective heating.
Finally, accessibility is important for user interaction. A thermostat should be installed at a height that is convenient for adjustments without requiring someone to use a ladder or step stool, ensuring that occupants can easily make any necessary changes to the settings.
What Common Mistakes Should Be Avoided When Installing a Thermostat?
When installing a thermostat for a heater, avoiding common mistakes can ensure optimal performance and efficiency.
- Incorrect Placement: Installing the thermostat in a location that is too close to heat sources, such as windows or heating vents, can result in inaccurate temperature readings. This can cause the heating system to cycle on and off unnecessarily, leading to discomfort and increased energy costs.
- Ignoring Sunlight Exposure: Placing the thermostat in direct sunlight can lead to overestimation of the room temperature. As the sun heats the area, the thermostat may signal the heater to shut off prematurely, which can result in uneven heating throughout the space.
- Poor Airflow: Installing the thermostat in an area with limited airflow, such as behind doors or in corners, can affect its ability to accurately gauge the room temperature. This can cause the heating system to operate inefficiently, potentially leading to cold spots in the room.
- Height Placement Errors: Positioning the thermostat too high or too low on the wall can yield incorrect temperature readings. Ideally, the thermostat should be installed at a height of about 5 feet from the floor, where it can best sense the average room temperature.
- Neglecting to Level the Thermostat: An unlevel thermostat can cause it to misread the temperature, resulting in erratic heating behavior. Ensuring that the thermostat is mounted straight will help it function properly and provide accurate readings.
- Failure to Consider Room Use: Installing a thermostat in a rarely used room can lead to inconsistent heating. It’s essential to place the thermostat in an area that reflects the typical usage and occupancy patterns of the home to achieve balanced heating.
Why Is Placing a Thermostat Near Windows Considered a Poor Practice?
Additionally, research conducted by the American Society of Heating, Refrigerating and Air-Conditioning Engineers (ASHRAE) emphasizes the importance of placing thermostats in locations that represent the average temperature of the space. This means avoiding areas affected by external elements, such as windows, which can disrupt the balance and effectiveness of HVAC systems. By positioning the thermostat away from these influences, homeowners can ensure more reliable performance and comfort in their living environments.
How Does Exposure to Direct Sunlight Affect Thermostat Functionality?
Exposure to direct sunlight can significantly impact thermostat functionality, leading to inaccurate temperature readings and inefficient heating. Here are the key considerations regarding thermostat placement:
- Direct Sunlight: Installing a thermostat in a location that receives direct sunlight can cause it to register higher temperatures than the actual ambient temperature. This can lead to the heating system turning off prematurely, resulting in uneven heating throughout the space.
- Heat Sources: Proximity to heat sources such as radiators, stoves, or appliances can skew thermostat readings. When a thermostat is placed too close to these heat-generating entities, it may cause the system to misjudge the temperature, thereby affecting overall comfort and efficiency.
- Airflow Considerations: Proper airflow is crucial for accurate readings; hence, placing a thermostat in a drafty area or near vents can lead to fluctuations in temperature detection. This can result in the thermostat responding to drafts rather than the room’s actual temperature.
- Height and Positioning: The height at which a thermostat is installed plays a vital role in its effectiveness. Thermostats are typically best placed at eye level on an interior wall, away from corners, to ensure they measure the average room temperature accurately.
- Interior Walls vs. Exterior Walls: Interior walls are generally preferred for thermostat placement as they are less susceptible to external temperature fluctuations. Exterior walls may be exposed to varying temperatures due to insulation issues, which can affect the thermostat’s performance.
What Benefits Can You Expect From Proper Thermostat Placement?
Proper thermostat placement can significantly enhance the efficiency and comfort of your heating system.
- Accurate Temperature Readings: Placing the thermostat in a location free from drafts, direct sunlight, or heat sources ensures it measures the ambient temperature accurately. This leads to the heating system operating based on the true temperature of the living space rather than being affected by external factors.
- Improved Energy Efficiency: A thermostat located in an optimal area can help reduce energy costs by allowing the heating system to cycle on and off as needed. This prevents overheating and overcooling, which can occur if the thermostat is improperly placed, leading to unnecessary energy consumption.
- Enhanced Comfort Levels: When installed in the right spot, the thermostat can maintain a more consistent temperature throughout the home, leading to a comfortable living environment. This minimizes temperature fluctuations that can occur if the thermostat is located in an area that doesn’t represent the overall space’s conditions.
- Better System Performance: Proper placement can help the heater operate more efficiently, as it can respond appropriately to the temperature needs of the space. A well-placed thermostat can also prolong the life of the heating system by preventing it from working harder than necessary.
- Reduced Hot and Cold Spots: By ensuring the thermostat is centrally located and not near any obstructions, you can avoid creating areas in the home that are noticeably warmer or cooler than others. This leads to a more balanced heating distribution throughout the space.
How Does Correct Placement Enhance Energy Efficiency in Heating Systems?
Heat sources such as radiators or appliances can create localized warm spots, which may cause the thermostat to signal the heater to shut off prematurely, resulting in uneven heating and wasted energy.
Height plays a critical role in thermostat function; placing it too low may lead to inaccurate readings due to the cooler air near the floor, while a height of approximately 5 feet allows the thermostat to sense the general air temperature more effectively.
Finally, understanding how different rooms are used can impact comfort levels; placing a thermostat in areas where people spend most of their time ensures that the heating system responds to their needs, leading to improved energy efficiency and comfort.
What Impact Does Thermostat Location Have on Comfort Levels Throughout the Home?
The location of a thermostat significantly influences the comfort levels throughout a home.
- Central Location: Installing a thermostat in a central area of the home helps to provide an accurate average temperature reading for the entire space. This placement allows the thermostat to effectively manage the heating system by ensuring that all rooms receive adequate warmth.
- Away from Heat Sources: It’s crucial to install the thermostat away from heat sources such as windows, radiators, or direct sunlight. If the thermostat is exposed to extra heat, it may cause the heating system to turn off prematurely, leading to inconsistent temperatures in other areas of the home.
- Height Placement: The height at which a thermostat is mounted can affect its performance, ideally at eye level or about 5 feet from the floor. This positioning helps to ensure that it accurately detects the air temperature in the living space rather than temperature variations caused by drafts or floor heating.
- Avoiding Drafts: Thermostats should be installed in locations that are shielded from drafts caused by doors, windows, or vents. Drafts can lead to erroneous temperature readings, prompting the heater to operate inefficiently and creating discomfort in the home.
- Consideration of Room Usage: The thermostat should be placed in a room that reflects the overall usage of the home, such as a living room or main hallway. This ensures that the thermostat manages heating based on the most commonly occupied spaces, enhancing comfort for the majority of occupants.