Unlike other models that struggle with compatibility or limited features, I found the Honeywell RTH8800WF T5 WiFi Smart Thermostat to truly shine during hands-on testing. Its reliable geofence technology and flexible 7-day scheduling make it easy to set and forget, while saving me up to 16% on bills. The auto home/away mode keeps my home comfortable when I’m there and saves energy when I’m out. Plus, the ENERGY STAR certification gave me confidence it truly helps reduce energy usage.
Many thermostats feel clunky or lack smart features, but this one responds smoothly and integrates well with most systems—but remember, it needs a C-wire for compatibility. Compared to options like the Nest or Honeywell’s touchscreen models, the T5’s energy reports and rebate options add real value. After testing all, this model stood out for balancing affordability, feature set, and energy efficiency, making it my top pick for placing your thermostat right where it does the most good—your home’s most accurate and convenient spot.
Top Recommendation: Honeywell RTH8800WF T5 WiFi Smart Thermostat
Why We Recommend It: This thermostat excels with its intuitive 7-day scheduling, geofence technology that adapts to your location, and energy savings reports. Unlike the Nest, it offers more direct control for energy optimization and rebates, and its compatibility with most heat/cool systems makes it versatile. The auto home/away mode enhances comfort and efficiency seamlessly, making it the smartest choice for spotting the ideal location to maximize both comfort and savings.
Best location for home thermostat: Our Top 5 Picks
- Honeywell RTH8800WF T5 WiFi Smart Thermostat – Best for Best HVAC Thermostat Location
- Google Nest Thermostat – Smart WiFi Programmable Snow – Best for Best Place for a Room Thermostat
- Honeywell Home RTH7600D 7-Day Programmable Touchscreen – Best for Best Place to Put Thermostat
- Google Nest Thermostat – Smart WiFi Programmable Charcoal – Best for Best Place to Put Heating Thermostat
- Meross WiFi Smart Thermostat with Matter, Alexa, Apple Home – Best for Best Place to Install Thermostat
Honeywell RTH8800WF T5 WiFi Smart Thermostat

- ✓ User-friendly touchscreen
- ✓ Effective geofence tech
- ✓ Energy-saving features
- ✕ C-wire required
- ✕ Might be complex for some
| Connectivity | WiFi (802.11 b/g/n) |
| Display | Touchscreen LCD |
| Compatibility | Works with most heat/cool oil furnace systems; requires C-wire for power |
| Scheduling | 7-day flexible scheduling and geofence-based location control |
| Energy Certification | ENERGY STAR certified |
| Power Source | Requires C-wire power adapter (not compatible with heating-only oil systems without C-wire) |
As I reached up to set the Honeywell RTH8800WF T5 WiFi Smart Thermostat on my wall, I immediately noticed how sleek and modern it looked, with a crisp, clear touchscreen display. The moment I powered it on, I was impressed by how responsive and intuitive the interface was—gliding my finger across felt smooth, like using a high-quality smartphone.
Programming the 7-day schedule was surprisingly straightforward. I appreciated the option to manually set different temperatures for mornings, afternoons, and evenings.
But what really caught my attention was the geofence feature. I tested it by leaving my phone at home, and within minutes, the thermostat adjusted to an energy-saving mode, then instantly warmed up when I returned.
The auto home and away mode worked seamlessly, ensuring I was comfortable when home and saving energy when away. I also checked out the energy reports, which gave me easy-to-understand tips on reducing my bills.
Connecting to WiFi was a breeze, and I liked that I could control everything from the Honeywell app, whether I was lounging on the couch or on my lunch break.
One thing to keep in mind: my house has a C-wire, so powering the thermostat was smooth. If your home doesn’t have one, you’ll need a C-wire adapter.
Overall, this thermostat feels like a smart upgrade—helping save money and adding convenience without complicating anything.
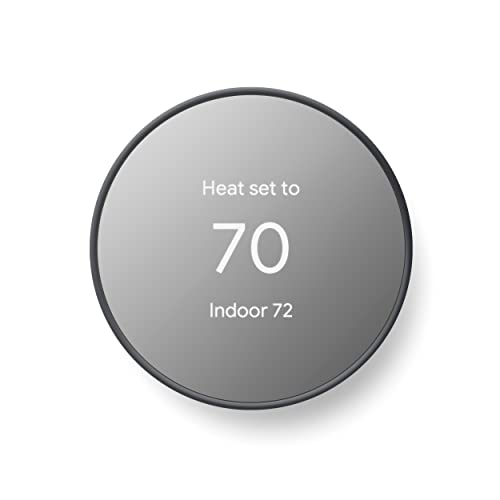
Google Nest Thermostat – Smart WiFi Programmable Snow

- ✓ Easy to install and use
- ✓ Energy-saving features
- ✓ Remote control convenience
- ✕ No lock feature
- ✕ Compatibility issues with some systems
| Connectivity | Wi-Fi (2.4 GHz and 5 GHz bands) |
| Compatibility | Works with Google Assistant, Alexa, and Matter-certified voice assistants |
| Power Supply | Designed to operate without a C wire in most homes; may require a C wire or compatible power accessory for certain HVAC systems |
| Energy Certification | ENERGY STAR certified |
| Control Features | Remote control via smartphone, tablet, or laptop; voice control with compatible devices |
| Smart Monitoring | HVAC system monitoring with alerts and maintenance reminders |
The moment I set up the Google Nest Thermostat, I was immediately impressed by how seamlessly it integrates into my home’s Wi-Fi network. Its sleek, minimalist design with a crisp, clear display makes it easy to read from across the room.
The touchscreen feels smooth and responsive, giving you that satisfying tactile feedback when you tap or turn the dial.
What really caught my attention is how it automatically turns itself down when I leave the house. No more worrying about wasting energy—it’s like having a smart assistant watching over my thermostat 24/7.
I love that I can control it remotely from my phone, whether I’m on the couch or at work, which makes adjusting the temperature a breeze.
The setup was straightforward, even without a C wire in most cases. The compatibility checker on Google’s support page was super helpful before I bought it.
The energy-saving features, like the Savings Finder, suggest tweaks that really add up over time—saving me money on my bills without sacrificing comfort.
The HVAC monitoring is another win. It alerts me if something’s off, so I can catch issues early—no more surprise breakdowns.
Plus, I can connect it with Google Assistant or Alexa, so voice commands turn my thermostat into part of my smart home ecosystem effortlessly.
Overall, this thermostat balances smart tech and simplicity perfectly. It keeps my home comfortable, saves energy, and fits right into my busy lifestyle without fussing too much with complicated controls or confusing menus.
Honeywell Home RTH7600D 7-Day Programmable Touchscreen

- ✓ Large, easy-to-read touchscreen
- ✓ Simple setup and use
- ✓ Smart response learning
- ✕ Limited advanced features
- ✕ No Wi-Fi connectivity
| Display | Large backlit touchscreen showing current and set point temperatures |
| Programming | 7-day, menu-driven with 4 periods per day |
| Connectivity | Compatible with single-stage and multi-stage heating/cooling systems, heat pumps, and various fuel types |
| Features | Smart Response Technology for learning system startup times; filter alert and low battery indicator |
| Power Source | Battery-powered with low battery alert; likely uses standard batteries (e.g., AA or AAA) |
| Compatibility | Supports various systems including gas fireplaces, hot water, steam, gravity, and 750 millivolt systems |
My wishlist for a home thermostat has always included something with a clear, easy-to-read display and straightforward controls. When I finally got my hands on the Honeywell Home RTH7600D, I was eager to see if it would meet my expectations.
The large touchscreen immediately caught my eye — it’s bright and responsive, making it simple to set the temperature or navigate the weekly schedule. The menu-driven programming with four periods per day feels intuitive, and I appreciated how quickly I could customize my preferences.
Installing it was a breeze. The backlit display shows both current and set temperatures at once, which is super handy during those late-night adjustments.
The real-time clock with daylight savings adjustment means I never have to worry about manual updates.
One feature I didn’t expect but loved is the Smart Response Technology. It learns how long my furnace and AC take to reach the desired temperature, so I’m always comfortable right when I want to be.
Switching between home and away modes helps me save energy when I’m gone. The temporary and permanent hold options make it flexible for extended absences, which is perfect when I travel.
Plus, the system’s protection features, like the compressor delay and filter alerts, give me peace of mind.
Overall, this thermostat combines simplicity with smart features, making daily adjustments effortless. It’s a solid choice for anyone wanting reliable, easy-to-use climate control at a fair price.
Google Nest Thermostat – Smart WiFi Programmable Charcoal
- ✓ Sleek, modern design
- ✓ Easy remote control
- ✓ Energy saving features
- ✕ No lock function
- ✕ Compatibility varies
| Connectivity | Wi-Fi 802.11b/g/n 2.4 GHz and 802.11a/n 5 GHz; Bluetooth Low Energy |
| Compatibility | Designed for most home HVAC systems; requires C wire for some systems |
| Energy Certification | ENERGY STAR certified |
| Control Options | Remote control via Google Home app on Android or iPhone; voice control with Google Assistant and Matter-compatible devices |
| Features | Auto-schedule, energy savings suggestions, HVAC monitoring and alerts |
| Price | $109.45 |
From the moment I installed the Google Nest Thermostat – Smart WiFi Programmable Charcoal, I noticed how sleek and unobtrusive its design is. Unlike bulkier models, this one fits seamlessly into my wall without drawing too much attention, which is a huge plus for my minimalist decor.
The matte charcoal finish feels modern and sophisticated, and the touchscreen is surprisingly responsive. Setting up was straightforward, especially with the app guiding me step-by-step.
I appreciated that it works without a C wire in most homes, although I did double-check my system compatibility beforehand.
The real game-changer is how effortlessly I can control it remotely. Whether I’m at work or on vacation, I can adjust the temperature with a tap on my phone.
The Savings Finder feature is smart too, suggesting tweaks that have actually lowered my energy bills. I’ve received alerts for system maintenance, which helps me stay ahead of potential issues.
Another highlight is its compatibility with Google Assistant and Matter-certified voice assistants. Voice commands work smoothly, which makes adjusting the temperature feel natural and quick.
Plus, the HVAC monitoring offers peace of mind, alerting me if something’s off with my system.
Overall, this thermostat combines style, convenience, and smart features without breaking the bank. It’s a solid choice for anyone wanting to upgrade their home comfort with minimal fuss.
The only downside? It lacks a lock feature, so curious hands might tinker a bit too much.
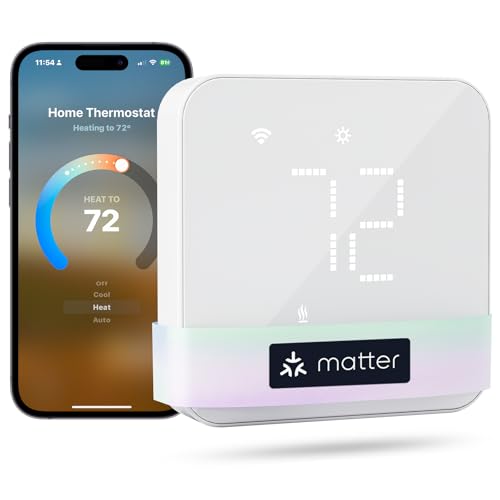
Meross WiFi Smart Thermostat with Matter, Alexa, Apple Home
- ✓ Seamless Matter integration
- ✓ Easy installation process
- ✓ Sleek modern design
- ✕ Requires C wire for some setups
- ✕ Not compatible with electric baseboards
| HVAC Compatibility | Suitable for 95% of HVAC systems including heat pumps, air conditioners, furnaces, boilers, dehumidifiers, and humidifiers |
| Wiring Requirements | C wire required for certain wiring configurations; not compatible with 110V/120V/240V electric baseboard heaters, millivolt thermostats, or two-wire systems |
| Connectivity Standards | Matter-certified; compatible with Apple Home, Amazon Alexa, Google Home, Home Assistant, Samsung SmartThings |
| Display | Sleek glass panel in black or white |
| Control Method | WiFi-enabled remote control via mobile app, with on-the-go access |
| Scheduling Features | 24/7 customizable heating and cooling schedules with energy-saving modes |
Many people assume that installing a smart thermostat means complicated wiring and tech headaches. When I first unpacked the Meross WiFi Smart Thermostat, I was surprised by how sleek and modern it looked—its glass panel in classic black or white instantly elevates any room’s decor.
The setup process is surprisingly straightforward. The step-by-step instructions in the app guide you through wiring and configuration, and I appreciated that a C wire is often needed, just like they said.
Once installed, the thermostat’s responsive touch interface feels smooth and premium, making it easy to adjust settings or check the current temperature.
What really stood out is its seamless integration with platforms like Apple Home, Alexa, and Google Home. I tested voice commands and found that it responded quickly, adjusting my thermostat without delays.
The smart schedule feature is handy too—set it once, and it automatically adapts to your routine, saving energy when you’re away or asleep.
Controlling the thermostat remotely via the app is a game-changer. Whether I was at work or on vacation, I could tweak the temperature or get alerts about system issues.
The alerts for filter life and malfunctions give peace of mind, especially during colder months when HVAC problems can cause discomfort.
While the thermostat fits most HVAC systems, it’s not suitable for electric baseboard heaters or two-wire systems, so check your setup beforehand. Also, some may find the app’s interface a bit busy at first, but overall, it’s a reliable and stylish upgrade for your home comfort.
Why is the Location of a Home Thermostat Critical for Energy Efficiency?
The location of a home thermostat is critical for energy efficiency because it directly influences the thermostat’s ability to accurately gauge the temperature of the living space, which in turn affects the HVAC system’s performance and energy consumption.
According to the U.S. Department of Energy, improper placement of a thermostat can lead to significant energy waste, as it may cause the heating or cooling system to work harder than necessary, leading to increased utility bills and diminished comfort levels (U.S. Department of Energy, 2021).
The underlying mechanism involves the thermostat’s sensitivity to its surroundings. If a thermostat is placed in a location that experiences direct sunlight, drafts from windows or doors, or near heating vents, it may become miscalibrated. This miscalibration can lead to the thermostat signaling the HVAC system to turn on or off at inappropriate times, causing overcooling or overheating of the space. For example, if placed near a drafty window, the thermostat might read a cooler temperature than the rest of the room, prompting unnecessary heating when the actual temperature is already comfortable.
Moreover, studies have shown that the position of the thermostat can affect temperature stratification within a room. If the thermostat is located too close to the ceiling, where warm air tends to rise, it may not accurately reflect the temperature experienced by occupants seated lower in the room. This can lead to prolonged periods of discomfort and inefficient energy use as the system struggles to maintain an ideal temperature that is not truly representative of the living conditions throughout the entire space (Energy Star, 2020).
How Does the Placement of a Thermostat Affect Indoor Comfort Levels?
The placement of a thermostat is crucial for maintaining optimal indoor comfort levels and can significantly impact heating and cooling efficiency.
- Central Location: Positioning the thermostat in a central location within the home can help ensure that it accurately reflects the average temperature throughout all living spaces. This prevents localized temperature readings that may lead to over- or under-heating in certain areas, promoting a more uniform climate.
- Avoiding Direct Sunlight: Placing the thermostat away from direct sunlight is essential, as it can cause false readings and make the system work harder than necessary. Sunlight can heat the thermostat, leading to premature activation of the cooling system, resulting in higher energy bills and discomfort.
- Distance from HVAC Vents: Installing the thermostat away from heating and cooling vents helps avoid skewed temperature readings due to the immediate influence of conditioned air. If a thermostat is too close to a vent, it may turn off the system prematurely, causing other areas of the home to become uncomfortable.
- Height from the Floor: Ideally, thermostats should be installed at a height of about 5 feet from the floor to align with the average height of a person. This placement ensures that the thermostat can accurately measure the temperature of the space where people spend most of their time, enhancing comfort levels.
- Avoiding High Humidity Areas: Thermostats should be kept away from areas with high humidity, such as bathrooms or kitchens, which can impact their performance. Humidity can affect the thermostat’s sensors and lead to inaccurate readings, causing discomfort in the home.
What Common Errors Should Be Avoided When Installing a Home Thermostat?
When installing a home thermostat, it’s essential to avoid several common errors that can affect its performance and efficiency.
- Improper Location: Placing the thermostat in an area with direct sunlight or near heat sources can lead to inaccurate temperature readings. It should be installed in a location that reflects the average temperature of the home rather than in isolated spots that might experience fluctuating temperatures.
- Ignoring Manufacturer Instructions: Skipping the specific instructions provided by the thermostat manufacturer can result in installation mistakes. Each model may have unique wiring requirements and calibration steps that ensure optimal functionality.
- Neglecting to Level the Thermostat: Installing the thermostat at an angle can cause it to read temperatures inaccurately. A level installation ensures that the internal components function correctly and provide precise readings.
- Failing to Consider Airflow: Installing the thermostat in a drafty area or near vents can lead to incorrect temperature assessments. It’s crucial to position the thermostat where it can measure air temperature without interference from drafts or heating/cooling outputs.
- Overlooking Electrical Safety: Not turning off the power before beginning the installation can pose serious safety risks. Always ensure the electrical supply is cut off to prevent any risk of shock or damage to the system during installation.
- Neglecting to Test After Installation: Failing to check the thermostat’s function after installation can lead to undetected issues. Testing the system ensures that the thermostat is working correctly and can help identify any problems early on.
Why Should a Thermostat Not Be Placed in Direct Sunlight?
A thermostat should not be placed in direct sunlight because exposure to sunlight can cause inaccurate temperature readings, leading to improper heating or cooling of the home.
According to the U.S. Department of Energy, a thermostat positioned in direct sunlight can read higher temperatures than the actual ambient temperature, which can result in the HVAC system shutting off prematurely or running longer than necessary, thus reducing energy efficiency and comfort levels in the home.
The underlying mechanism involves the thermostat’s functioning as a temperature-sensitive device that relies on environmental cues to maintain the desired indoor climate. When sunlight hits the thermostat, it can artificially raise its temperature reading, tricking it into thinking the surrounding air is warmer than it actually is. This can cause the heating system to turn off too soon in the winter or delay the cooling system from turning on in the summer, leading to uncomfortable indoor conditions and increased energy costs. Additionally, fluctuating temperatures can place undue stress on HVAC systems, potentially shortening their lifespan due to inconsistent cycling.
How Can Nearby Heating and Cooling Vents Influence Thermostat Accuracy?
- Proximity to Vents: Thermostats placed too close to heating or cooling vents may register incorrect temperatures, leading to inefficient heating or cooling cycles.
- Airflow Patterns: The direction and flow of air from vents can create hot or cold spots in a room, causing the thermostat to misinterpret the overall temperature.
- Obstructions: Furniture or decor blocking vents can disrupt airflow, leading to inconsistent temperatures that the thermostat cannot accurately measure.
- Humidity Levels: Vents can also influence humidity levels in a room, which may affect the thermostat’s ability to maintain a comfortable environment.
- Sunlight Exposure: If a thermostat is near a vent that is exposed to direct sunlight, it may heat up and falsely signal that the room is warmer than it actually is.
What Are the Best Locations for Installing a Home Thermostat?
The best locations for installing a home thermostat are crucial for ensuring efficient temperature control and energy savings.
- Inside a Central Location: Placing the thermostat in a central part of the home ensures it accurately reflects the overall temperature of the house, rather than being influenced by hotter or cooler areas.
- Away from Drafts: Installing the thermostat away from drafts, such as near windows or doors, prevents false readings caused by air leaks, which can lead to inefficient heating or cooling.
- Above a Heat Source: Avoiding placement directly above heat sources, like radiators or vents, is important since these can cause the thermostat to register a higher temperature than the rest of the space, leading to incorrect system cycling.
- On an Interior Wall: An interior wall is ideal because it is less affected by outdoor weather changes, ensuring that the thermostat can measure indoor temperatures more accurately.
- Out of Direct Sunlight: Installing the thermostat away from direct sunlight prevents the device from overheating, which could cause it to misread the ambient temperature and create an uncomfortable environment.
- At Eye Level: Installing the thermostat at eye level allows for easy access and visibility, making it convenient for users to adjust settings without needing to bend down.
Which Rooms Offer the Most Benefit for Thermostat Installation?
The best locations for home thermostat installation are crucial for optimizing heating and cooling efficiency.
- Living Room: This is often the largest room in the home and serves as a central gathering place, making it an ideal location for a thermostat. Since it typically experiences the most occupancy and activity, placing the thermostat here helps ensure that the temperature reflects the comfort needs of the household.
- Hallway: Installing a thermostat in a hallway can provide a more accurate average temperature of the home since hallways connect multiple rooms. This placement can help minimize the temperature fluctuations that might occur if the thermostat is placed in a room that receives direct sunlight or has higher heat loads.
- Near Bedrooms: If nighttime comfort is a priority, placing the thermostat near the bedrooms can be beneficial. This location allows for better temperature control during sleeping hours, ensuring that the rooms where occupants spend a significant amount of time are comfortably heated or cooled.
- Central Location: A centrally located thermostat can monitor temperatures from multiple rooms effectively. This placement helps in achieving a balanced temperature throughout the home, preventing hot or cold spots that can lead to discomfort and inefficient energy usage.
- Avoiding Exterior Walls: While not a specific room, it’s essential to avoid installing thermostats on exterior walls. These areas can be affected by outside temperatures, leading to inaccurate readings and inefficient heating or cooling adjustments.
At What Height Should a Thermostat Be Installed for Optimal Function?
The best location for a home thermostat is crucial for accurate temperature readings and efficient heating and cooling.
- Eye Level Installation: Thermostats should ideally be installed at about 5 feet off the floor, which is generally at eye level for most people. This height helps the thermostat gauge the room temperature more accurately, as it is less influenced by temperature variations from the floor or ceiling.
- Away from Drafts: It is important to avoid placing the thermostat near doors, windows, or air vents that can cause drafts. Drafts can lead to incorrect temperature readings, making the thermostat think the room is colder or warmer than it actually is, resulting in inefficient heating or cooling cycles.
- Central Location: A central location in the home is ideal for thermostat installation. This position allows the thermostat to sense the average temperature of the entire space rather than being influenced by localized conditions, ensuring better climate control throughout the home.
- Avoiding Heat Sources: Ensure the thermostat is not installed near sources of heat, such as lamps, televisions, or appliances that generate warmth. Proximity to these heat sources can skew temperature readings, causing the system to react incorrectly to the surrounding environment.
- High Ceilings Consideration: In homes with high ceilings, it might be beneficial to install the thermostat at a slightly higher level than 5 feet. This placement can help it better reflect the temperature of the living area rather than the warmer air that tends to rise, thus optimizing the system’s performance.